5. Product Rendering with AI
1 Introduction
This workflow is inspired by the tutorial from 惫懒の欧阳川. We’ll demonstrate how to use ComfyUI, ControlNet, and IPAdapter to create high-quality product renders. AI-driven product rendering allows you to generate realistic product images with minimal manual input, making it ideal for e-commerce, advertising, and product design.
Before diving into the workflow, we’d like to introduce Shakker, a platform offering a wide range of commercially usable models and assets. Models purchased from Shakker are licensed for commercial use, making it a valuable resource for product designers and 3D artists looking to integrate professional models into their projects.
In this tutorial, we’ll focus on enhancing a backpack’s line art using ControlNet. The process starts by using LineArt ControlNet to define the structure, followed by applying Soft Edge Line to refine and strengthen the edges. Once the line art is complete, we’ll demonstrate a simple texture modification using positive condition keywords. Finally, we’ll apply a more advanced material change using an RGB mask, where IPAdapter selectively modifies the texture of the red areas in the design, allowing for precise control over specific elements of the product’s appearance.
The complete workflow is available below, and you can import the JSON file into ComfyUI by dragging it into the interface.
Download the workflow JSON file
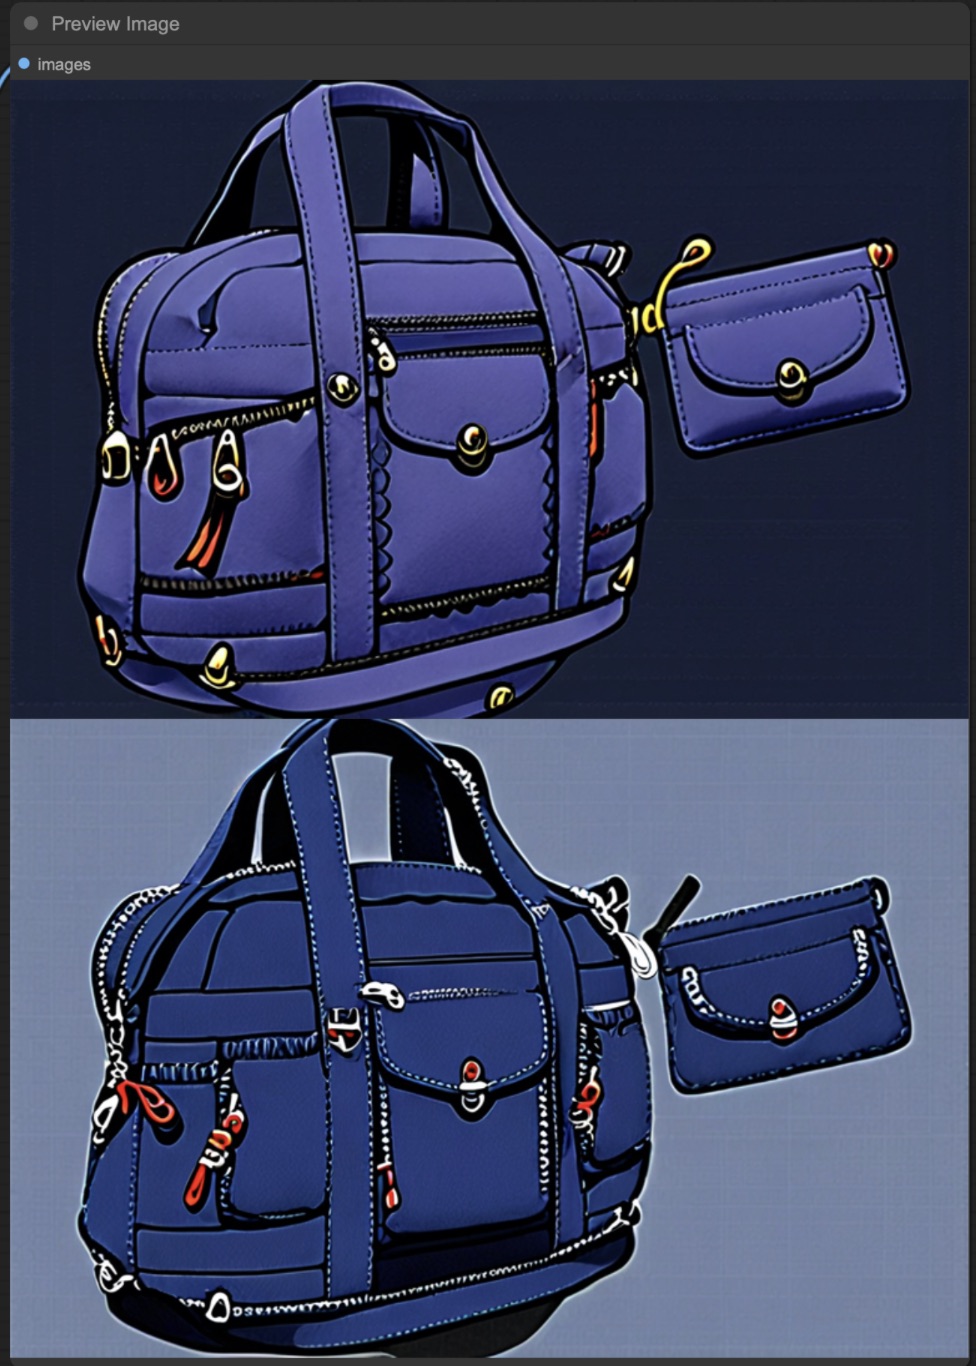
- Rendered Product Example:
2 Workflow Overview
- Workflow Setup:
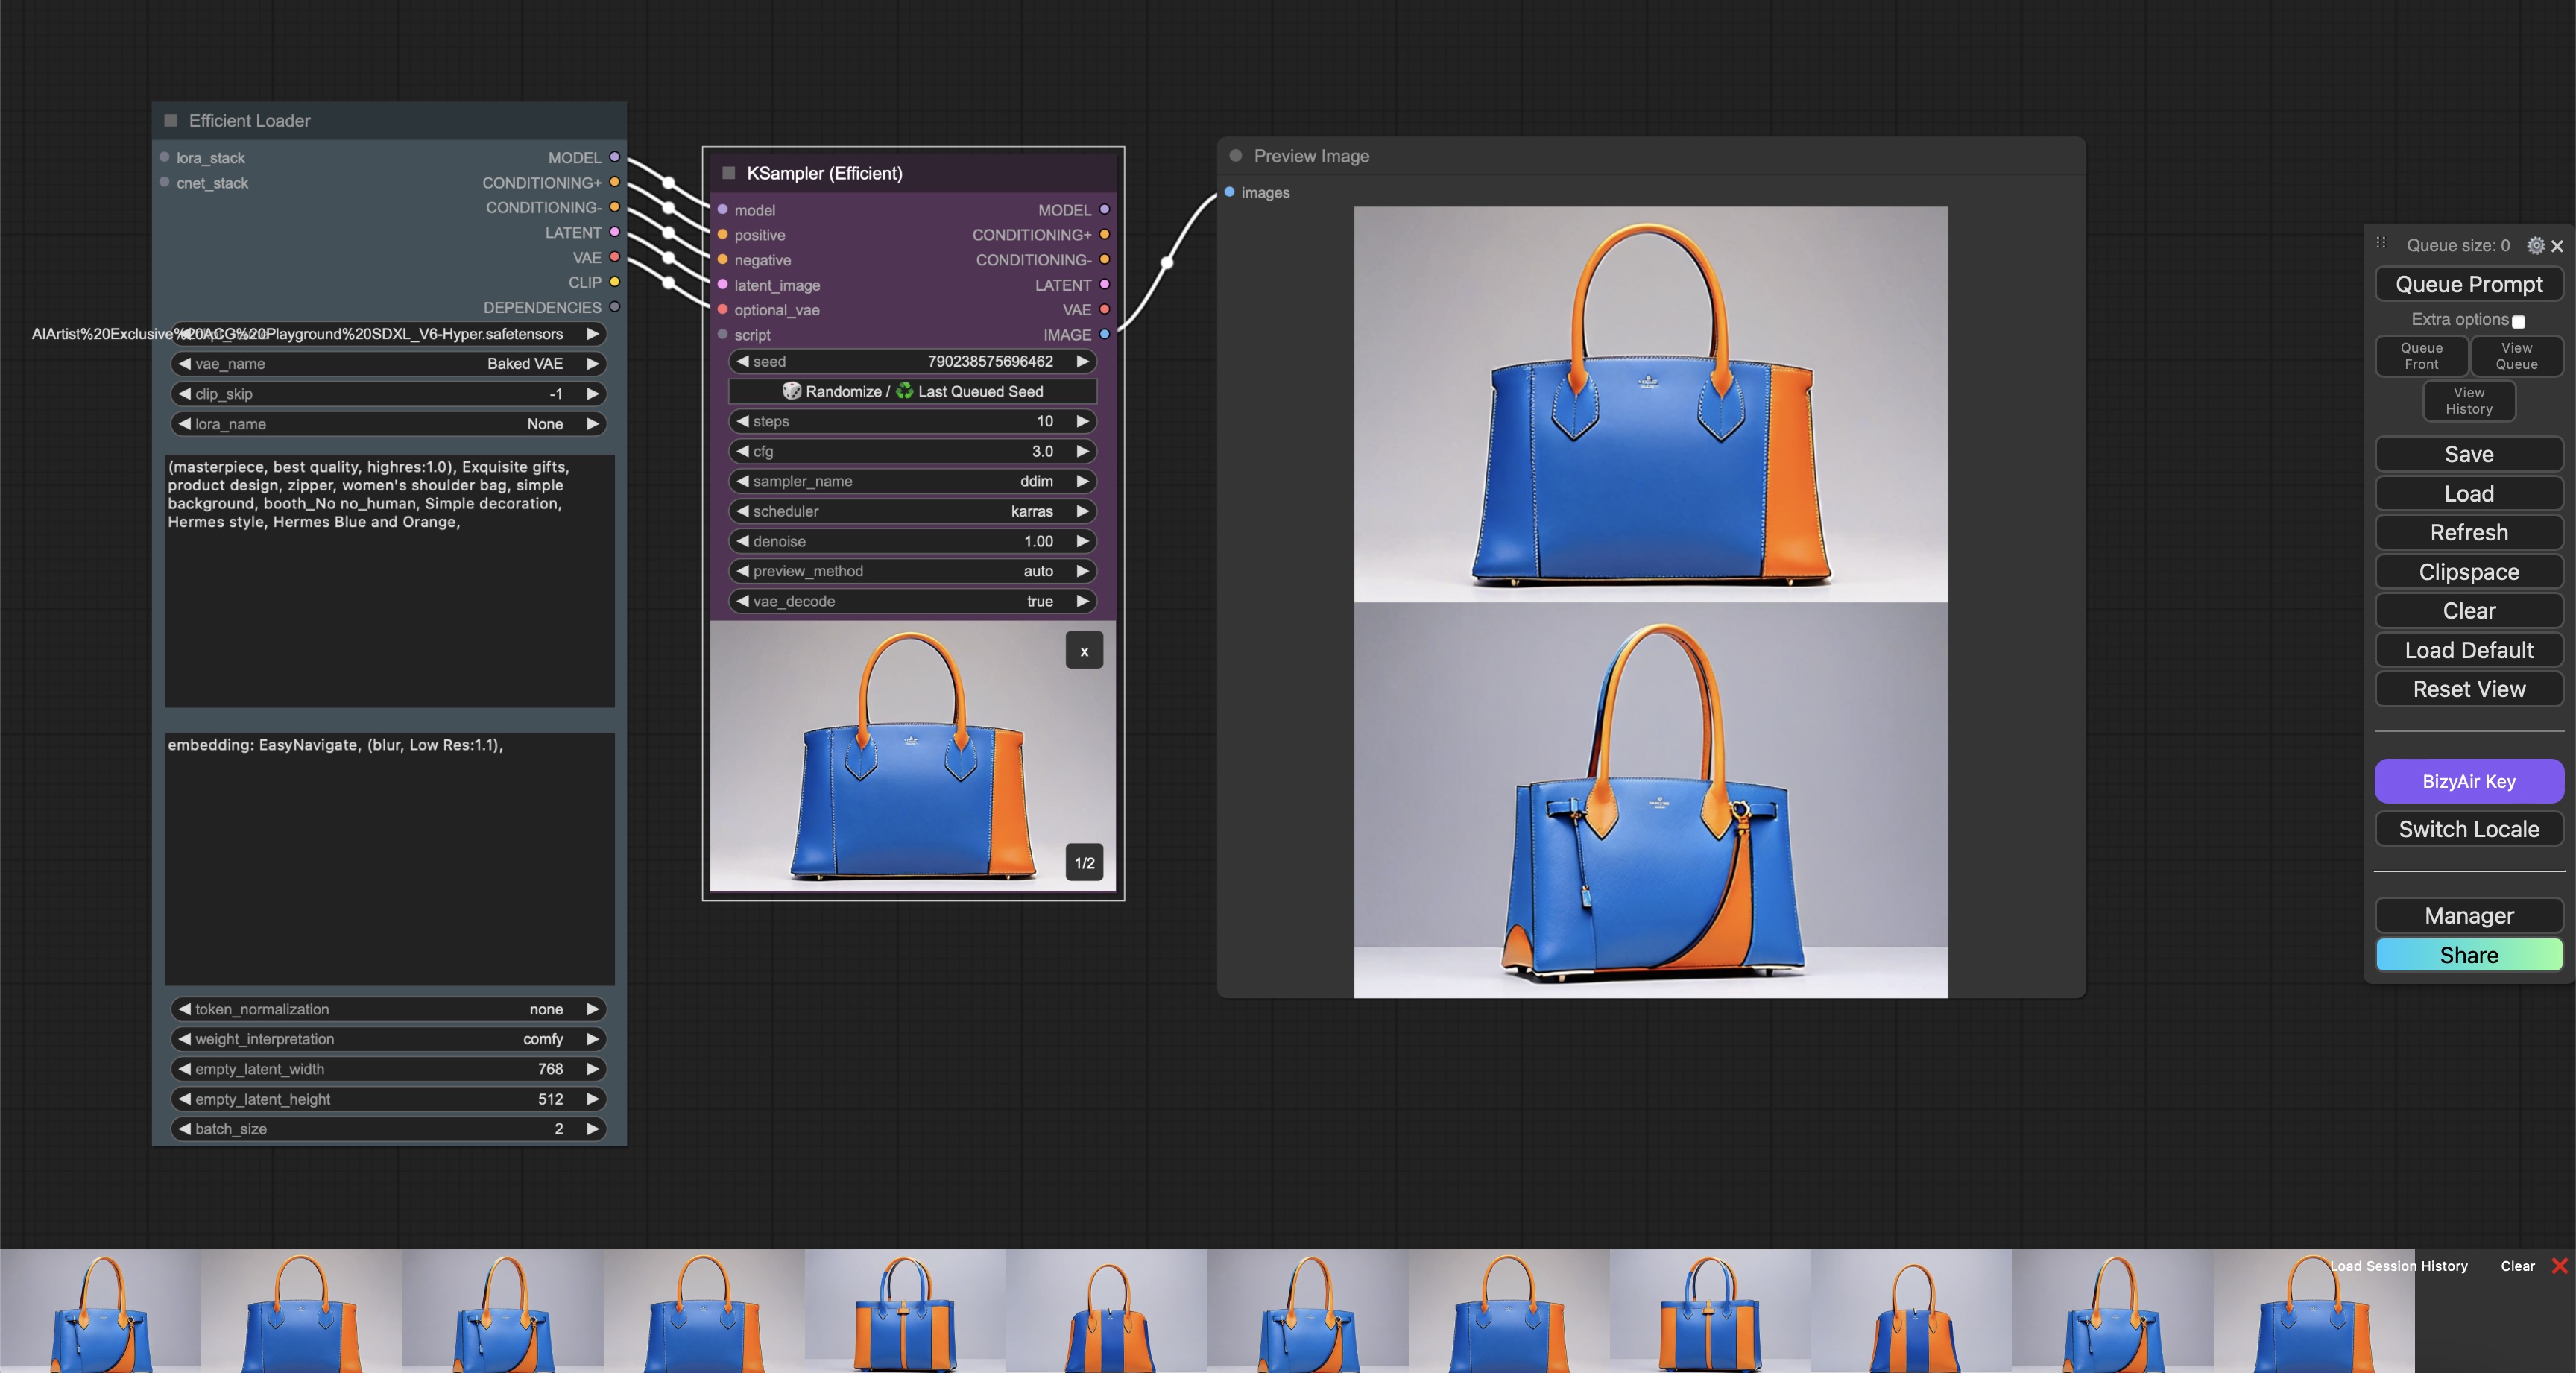
Before diving into the more complex product rendering process, it’s essential to first set up a basic ComfyUI workflow using positive and negative keywords. This step helps create a foundational product render by providing clear descriptions of what the product should look like and eliminating any unwanted elements.
- Positive Keywords:
(masterpiece, best quality, highres:1.0), Exquisite gifts, product design, zipper, backpack, simple background, booth_No no_human, Simple decoration- Negative Keywords:
embedding: EasyNavigate, (blur, Low Res:1.2), gold, This basic workflow will generate an initial render of the product based on your keywords.
- Basic Workflow:
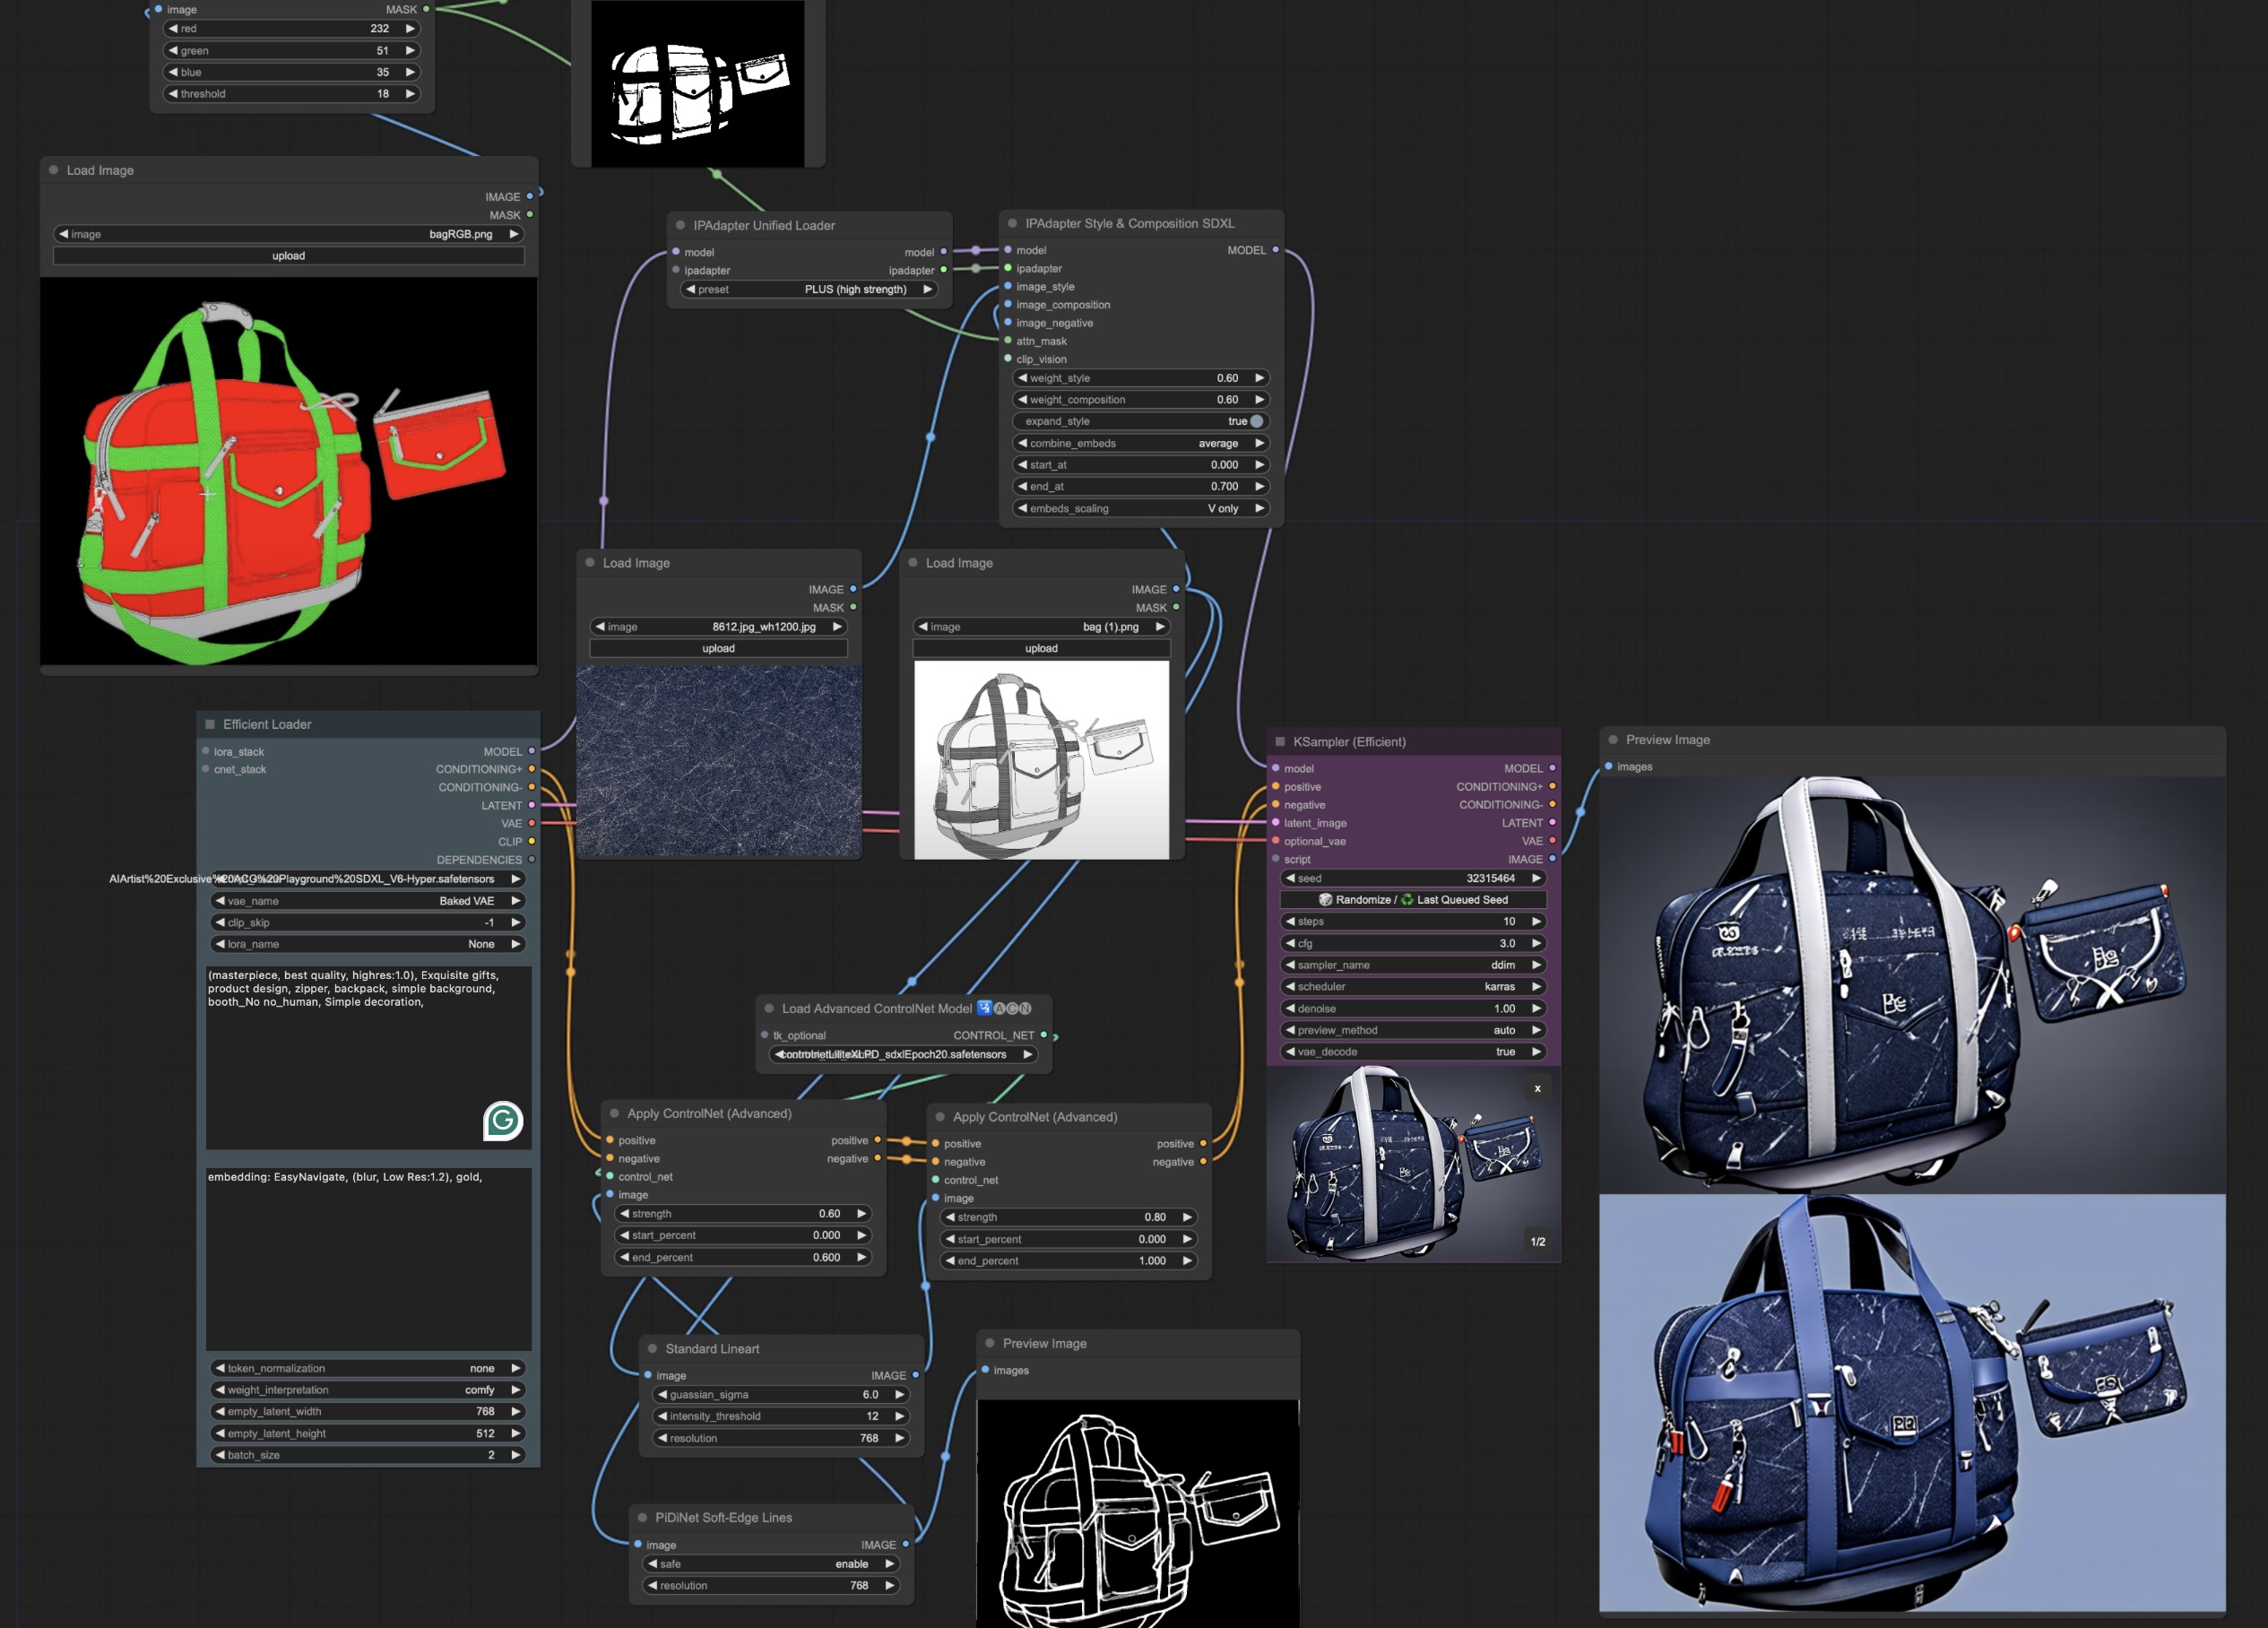
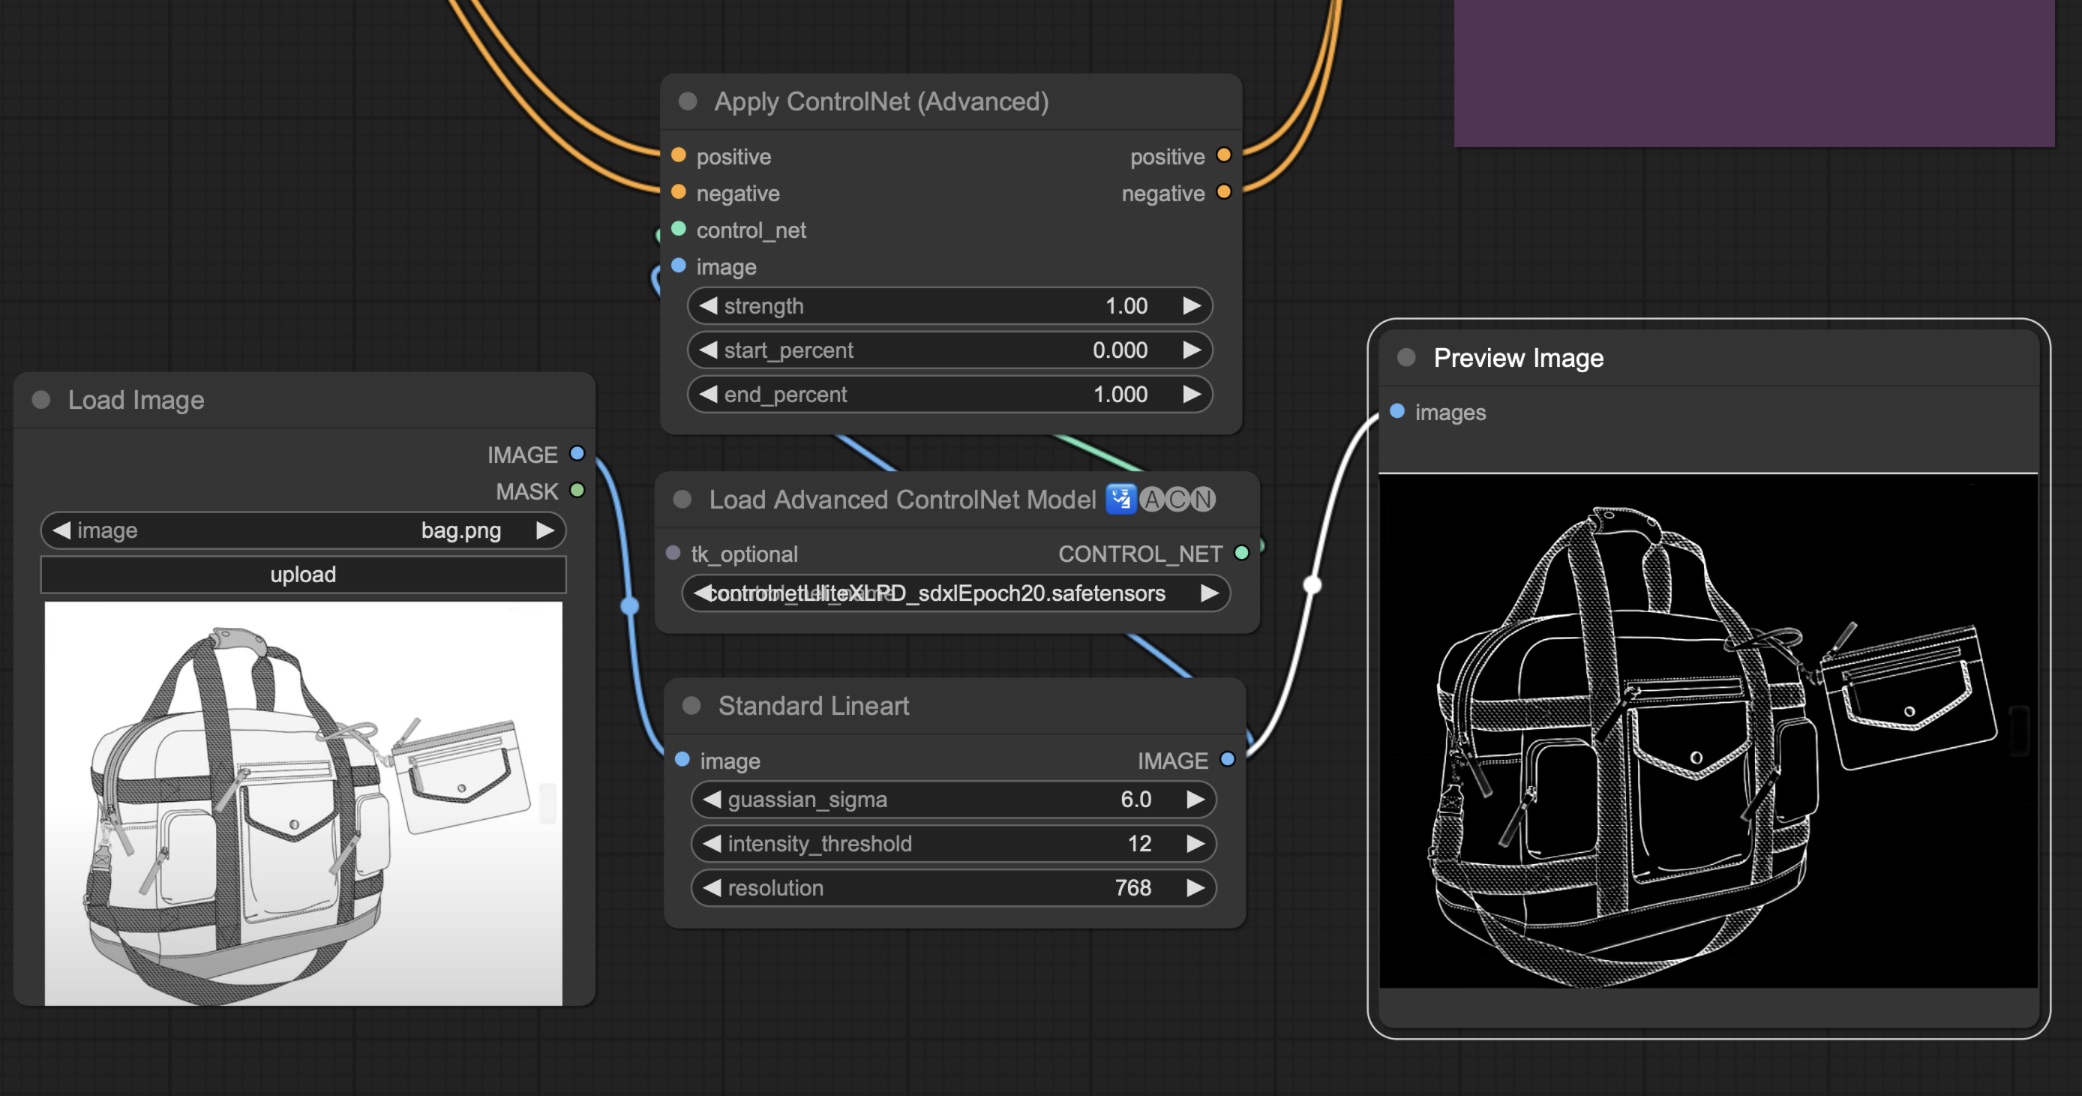
2.1 Step 1: Line Art Extraction with ControlNet
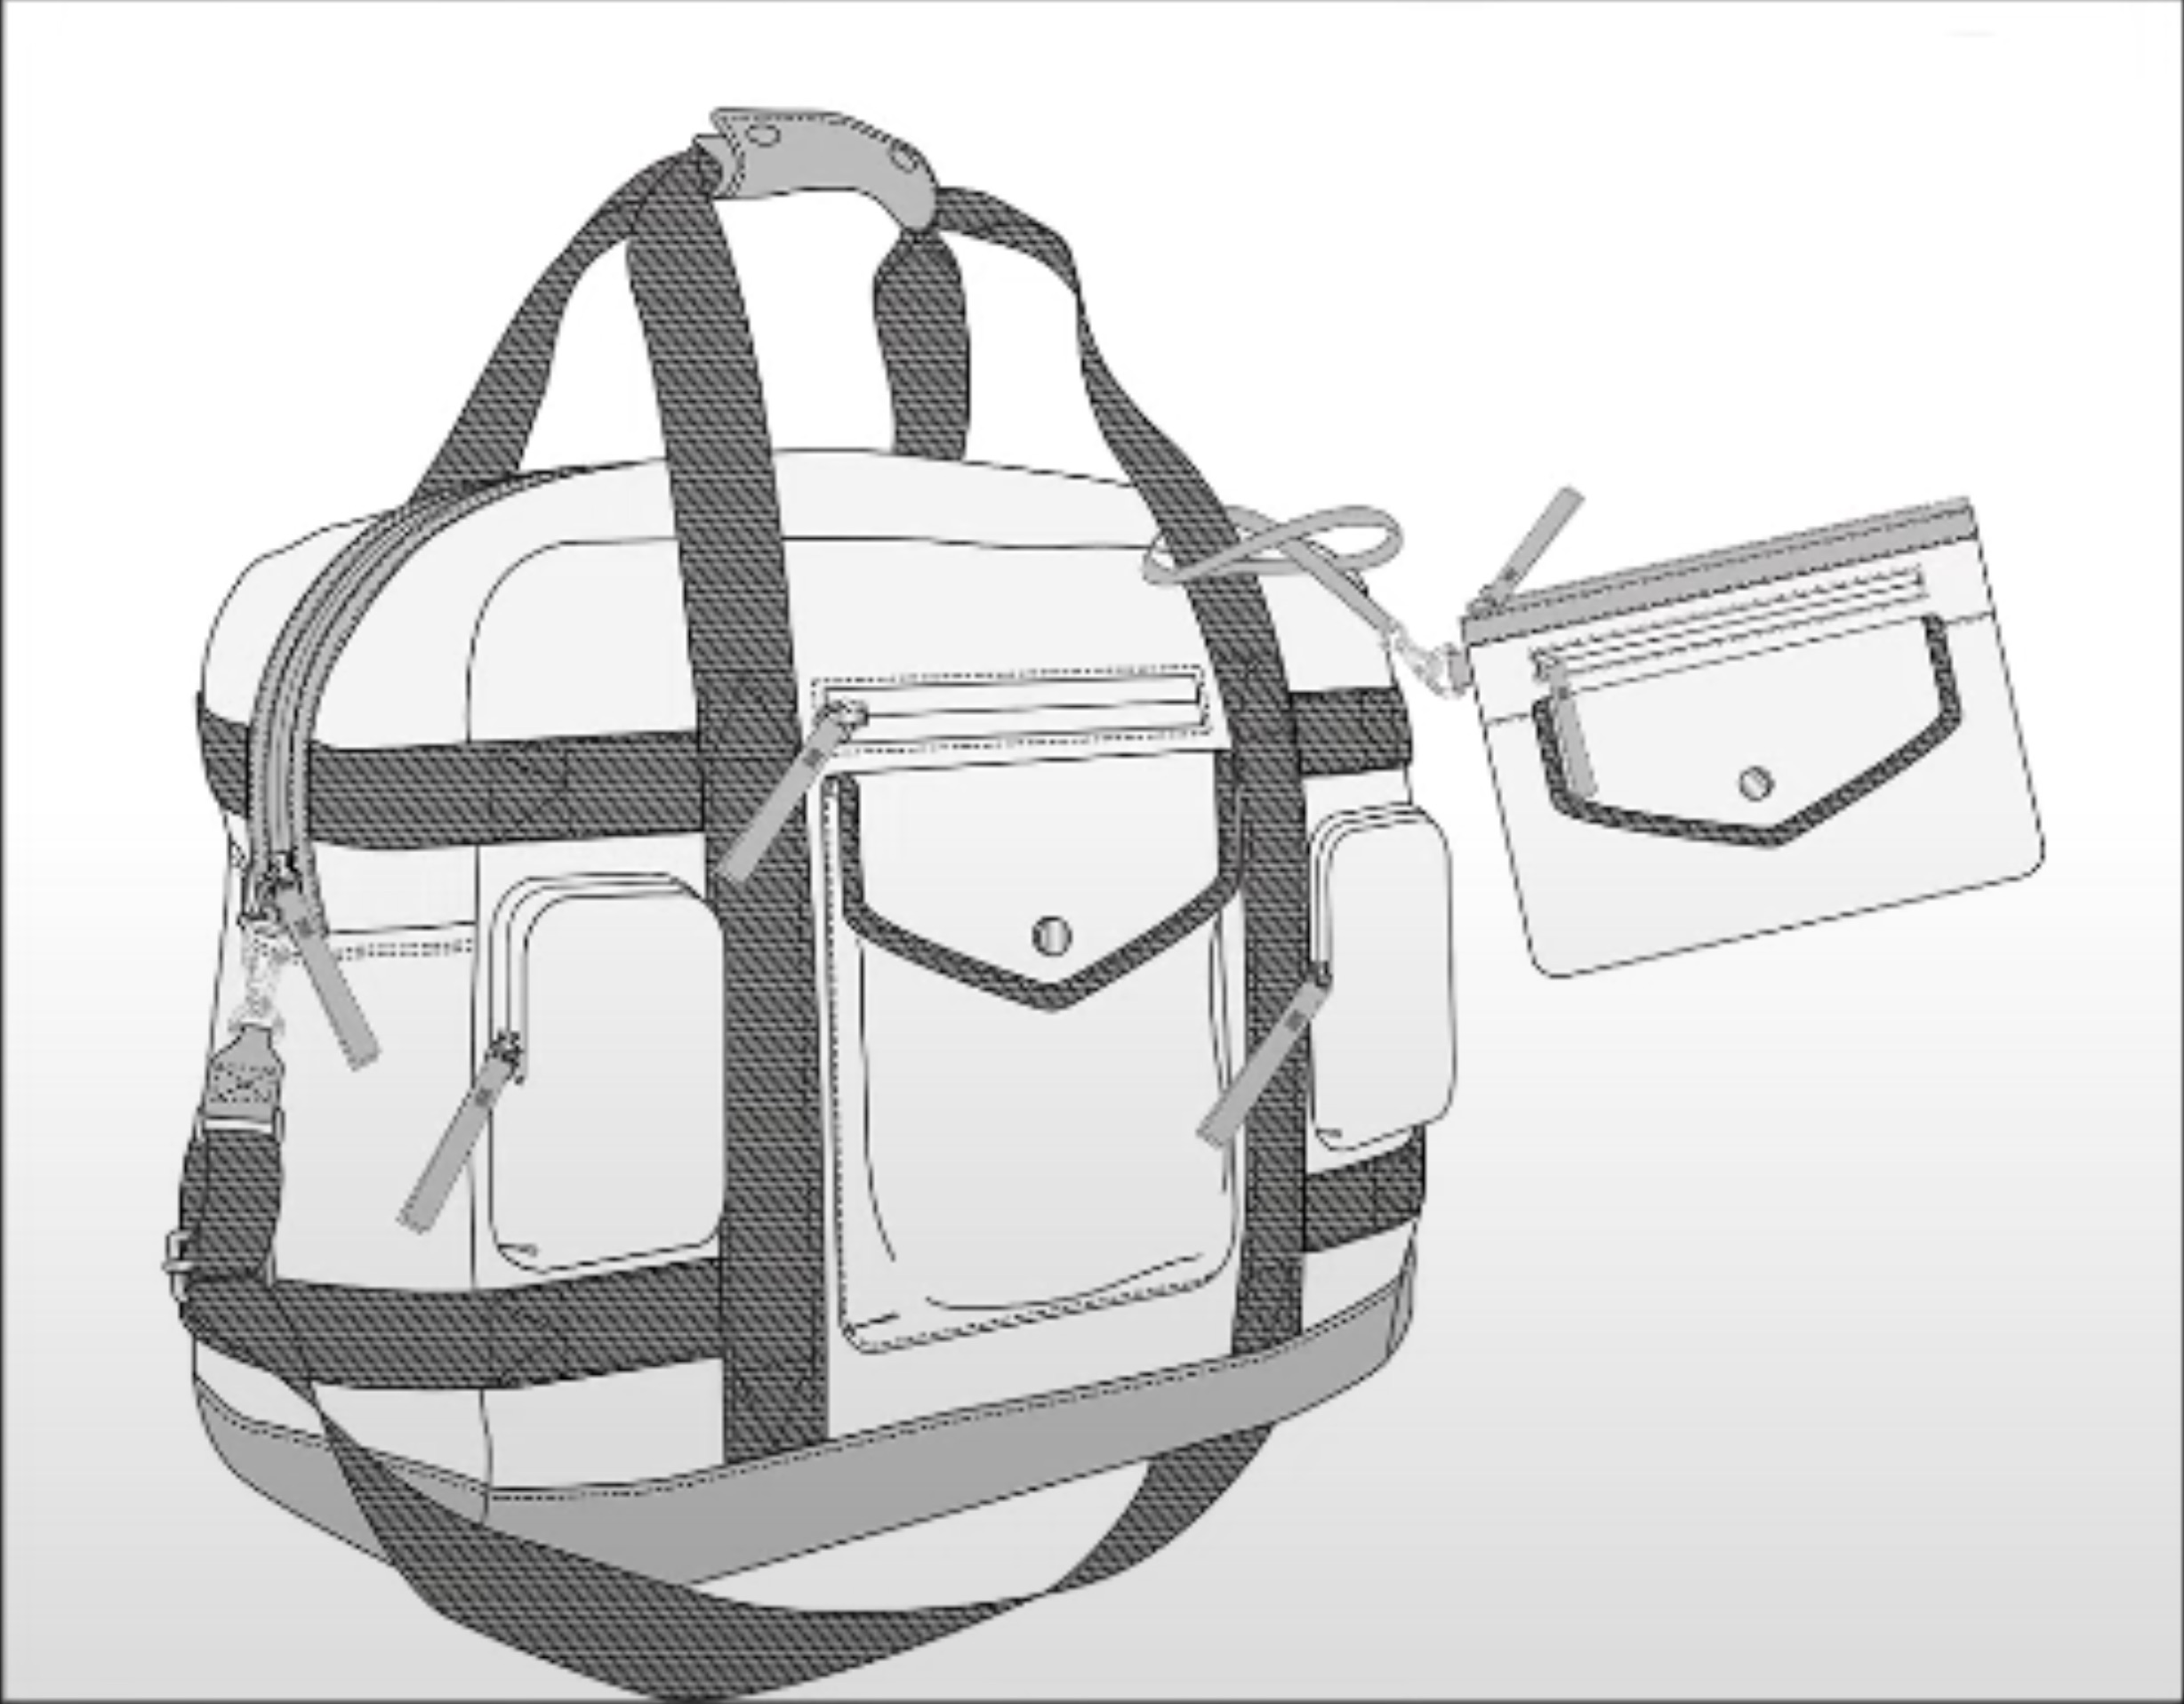
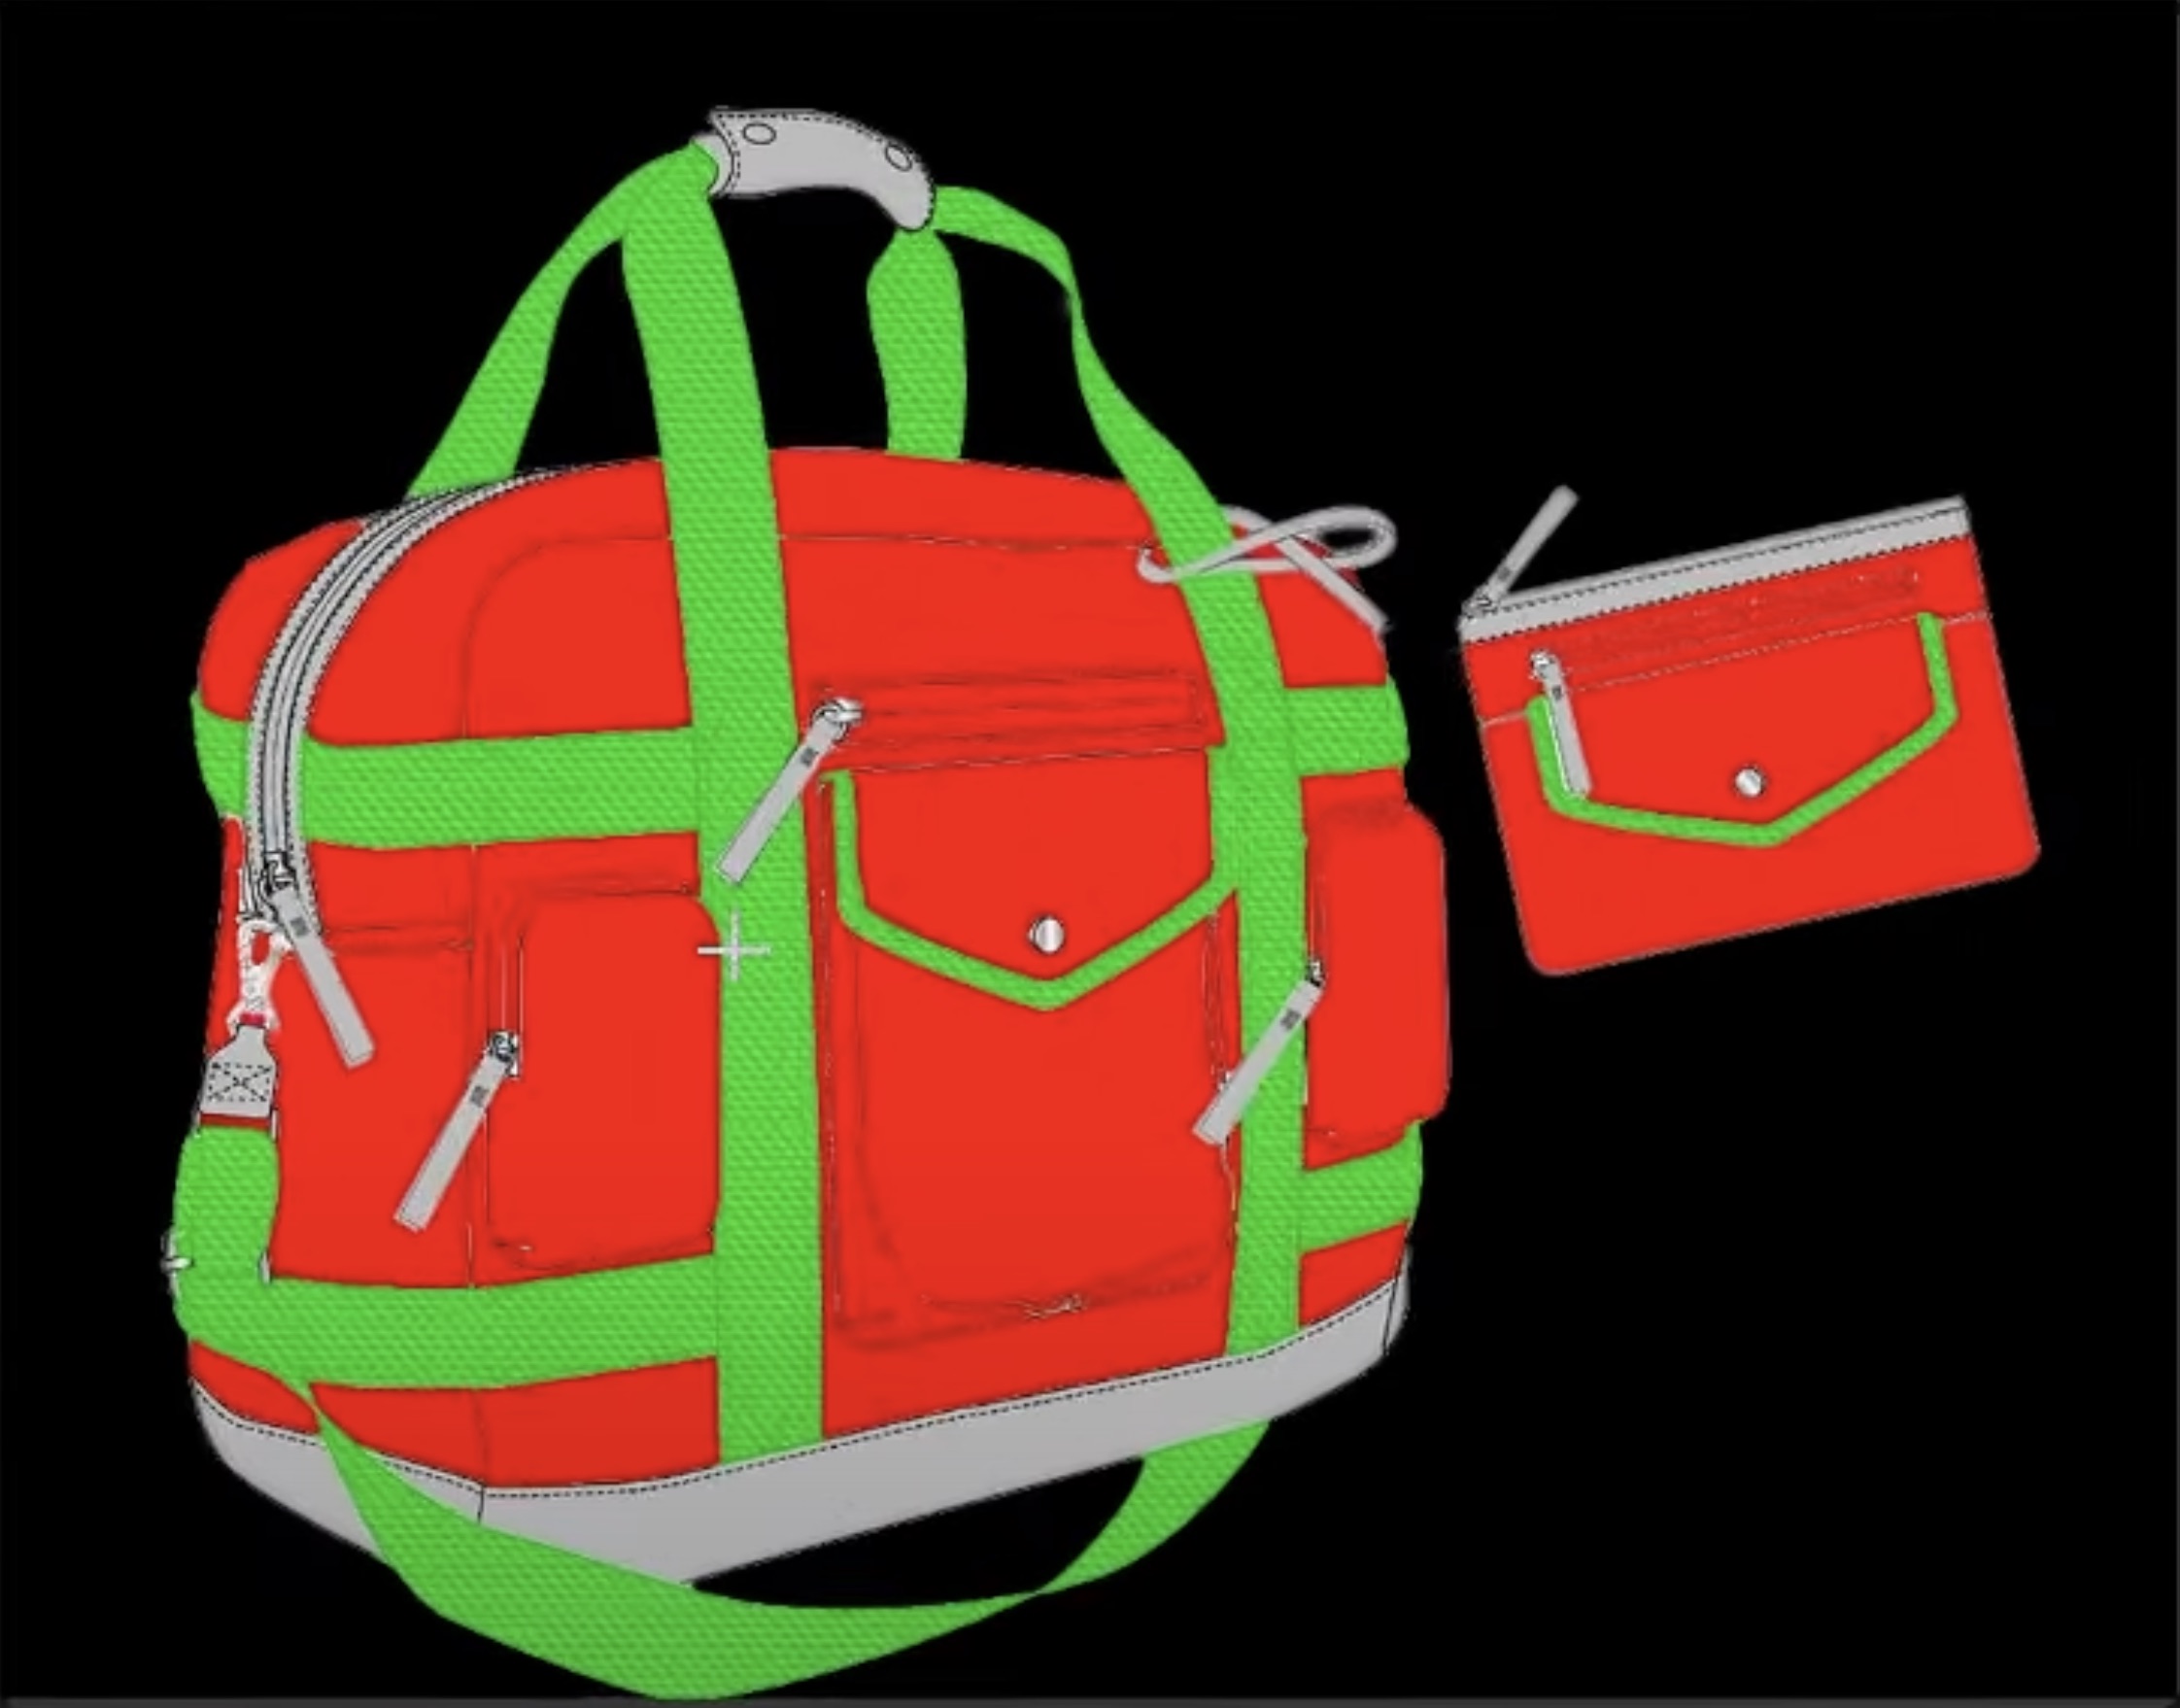
The design for the backpack is prepared beforehand. In this step, we use the LineArt ControlNet model to extract the line art from the pre-existing design. This helps isolate the key structural elements of the backpack, ensuring that the design lines are clean and ready for further modifications.
- Bag Sample:
- LineArt ControlNet Example:
2.2 Step 2: Strengthening Line Edges with Soft Edge Line
After generating the line art, the Soft Edge Line technique is applied to deepen and refine the line edges, giving the image a more defined and professional look. This step enhances the overall clarity of the design, making the details stand out.
Soft Edge Line Example:
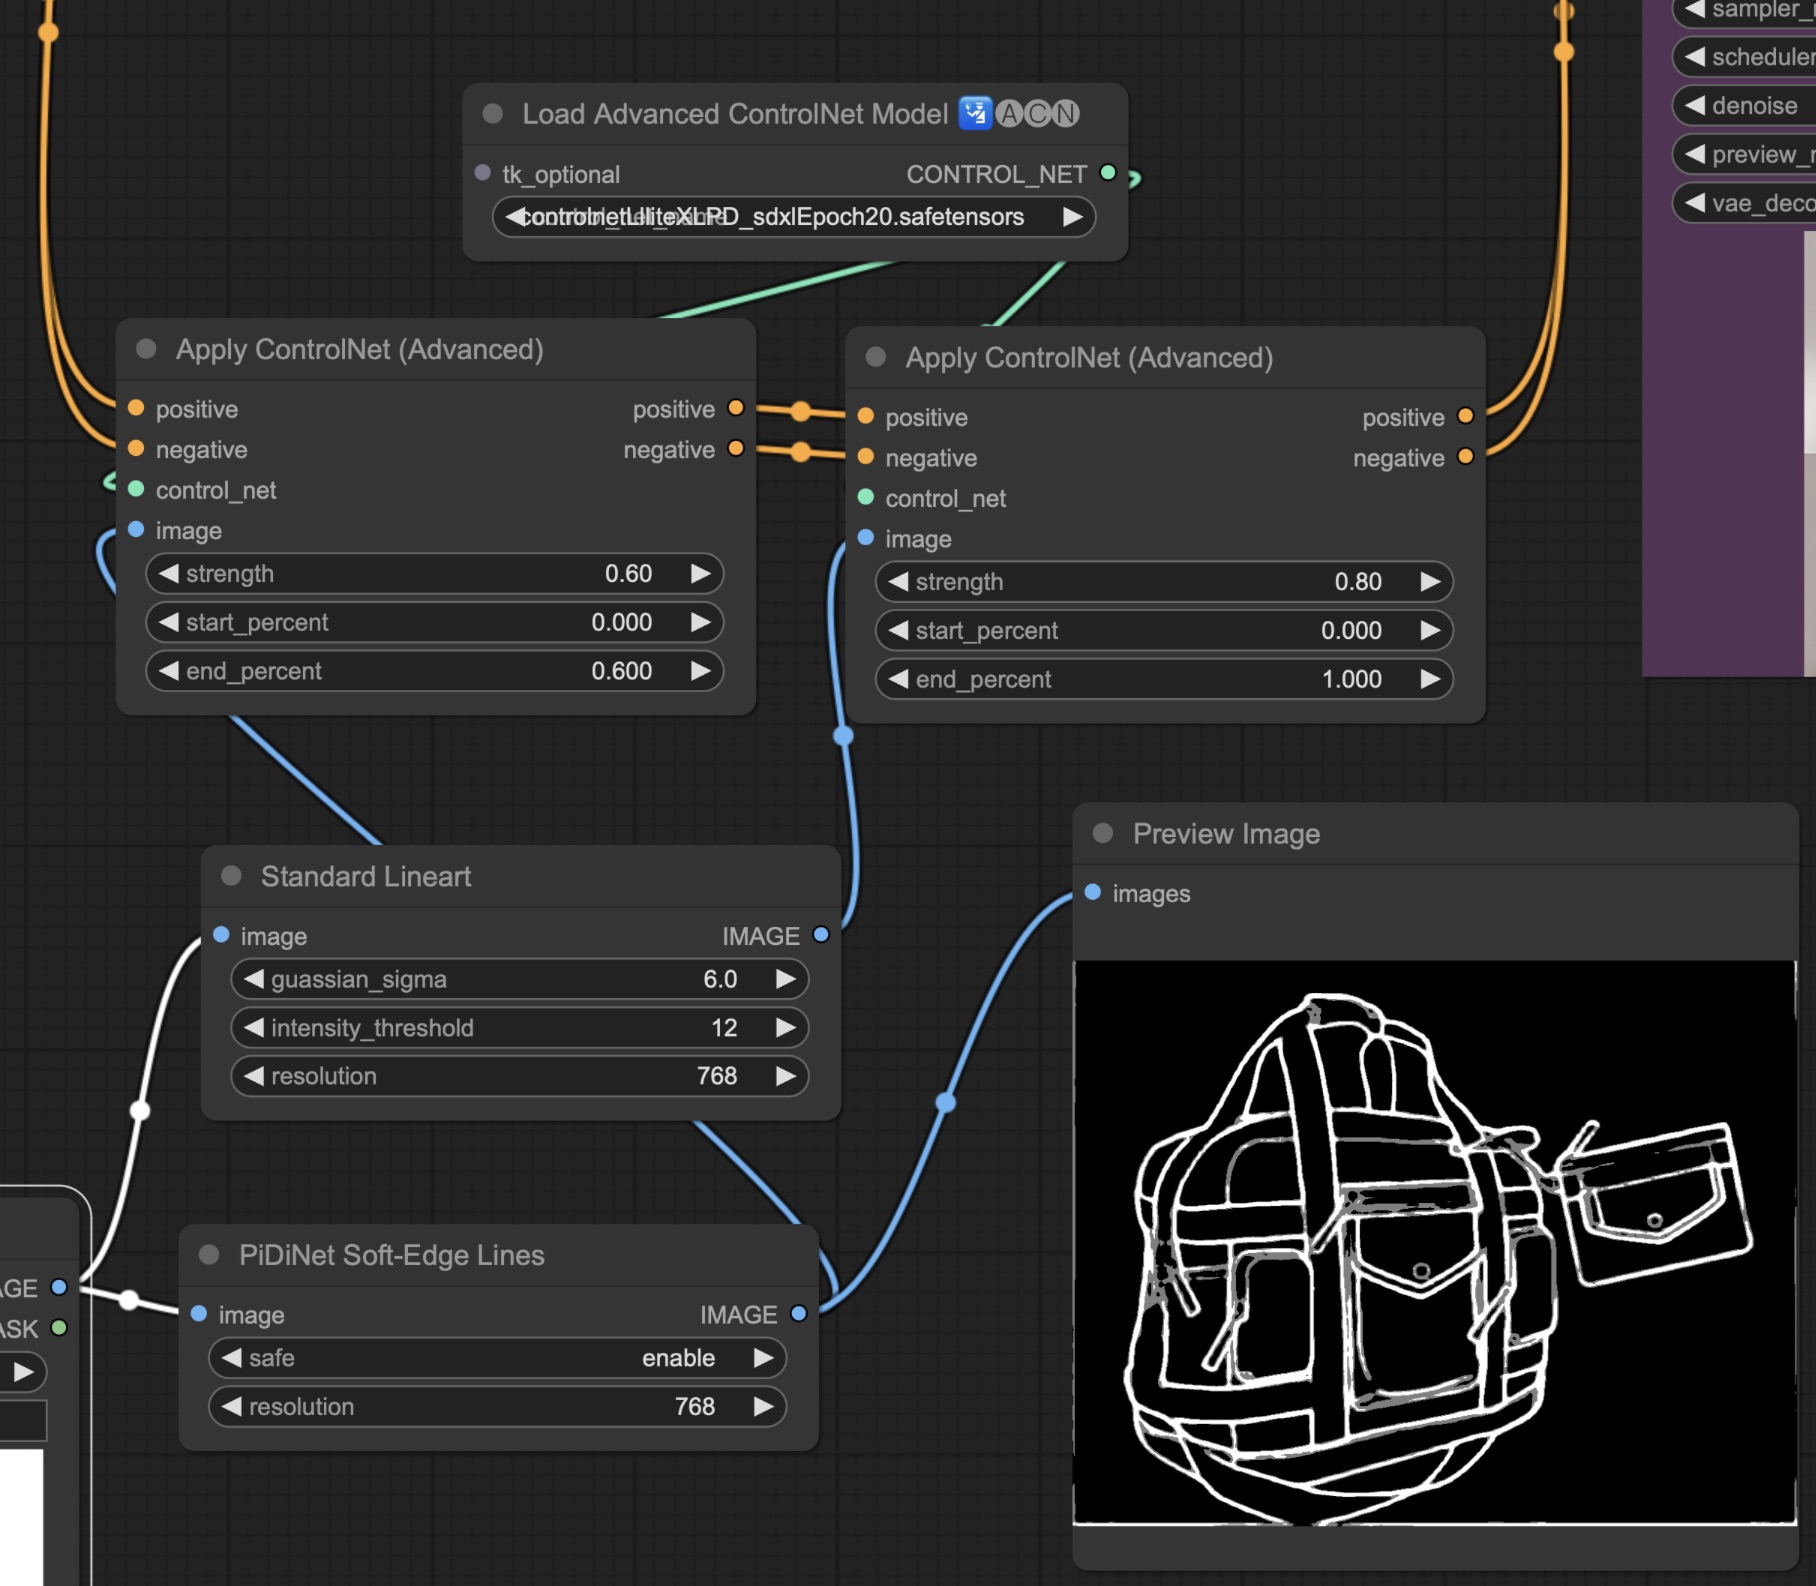
Soft Edge Line Workflow:
Multiple ControlNet and Soft Edge Line Workflow:

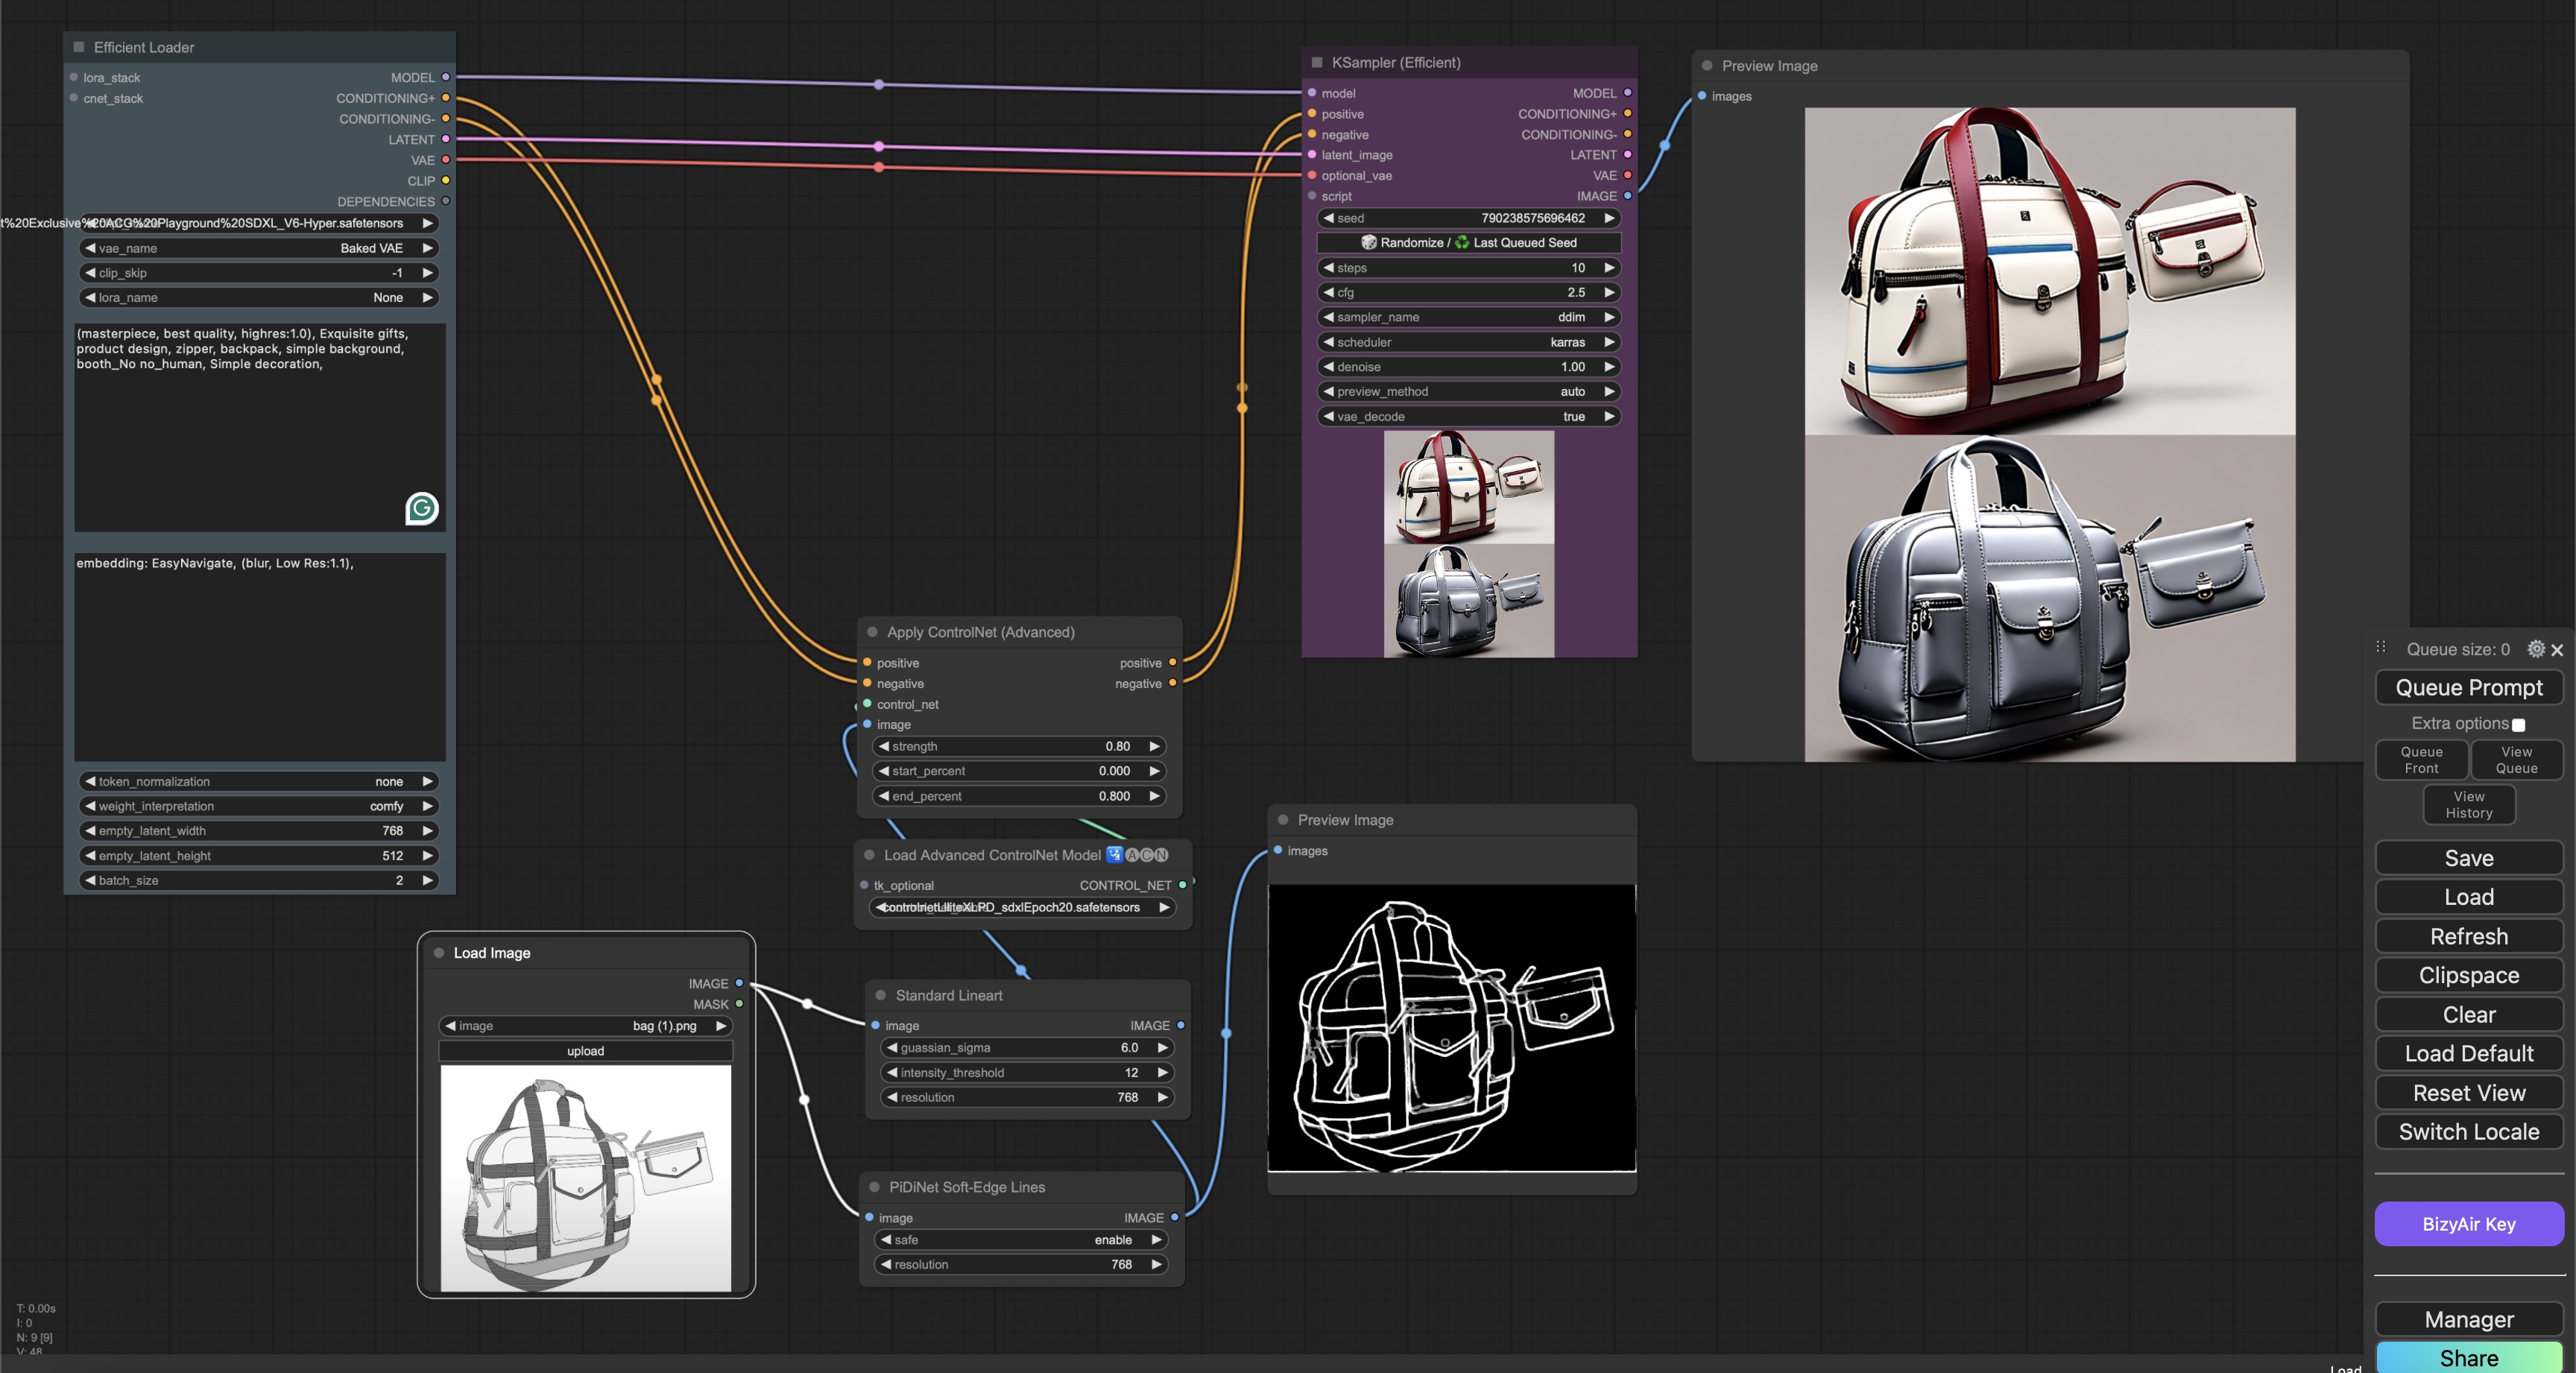
2.3 Step 3: Texture Modification with Positive Conditions
Once the line art is complete, we demonstrate a simple texture modification using positive condition keywords. These keywords describe the material or texture you wish to apply to the backpack. For example, “leather” or “canvas” can be used to generate different textures.
Leather Texture Example:
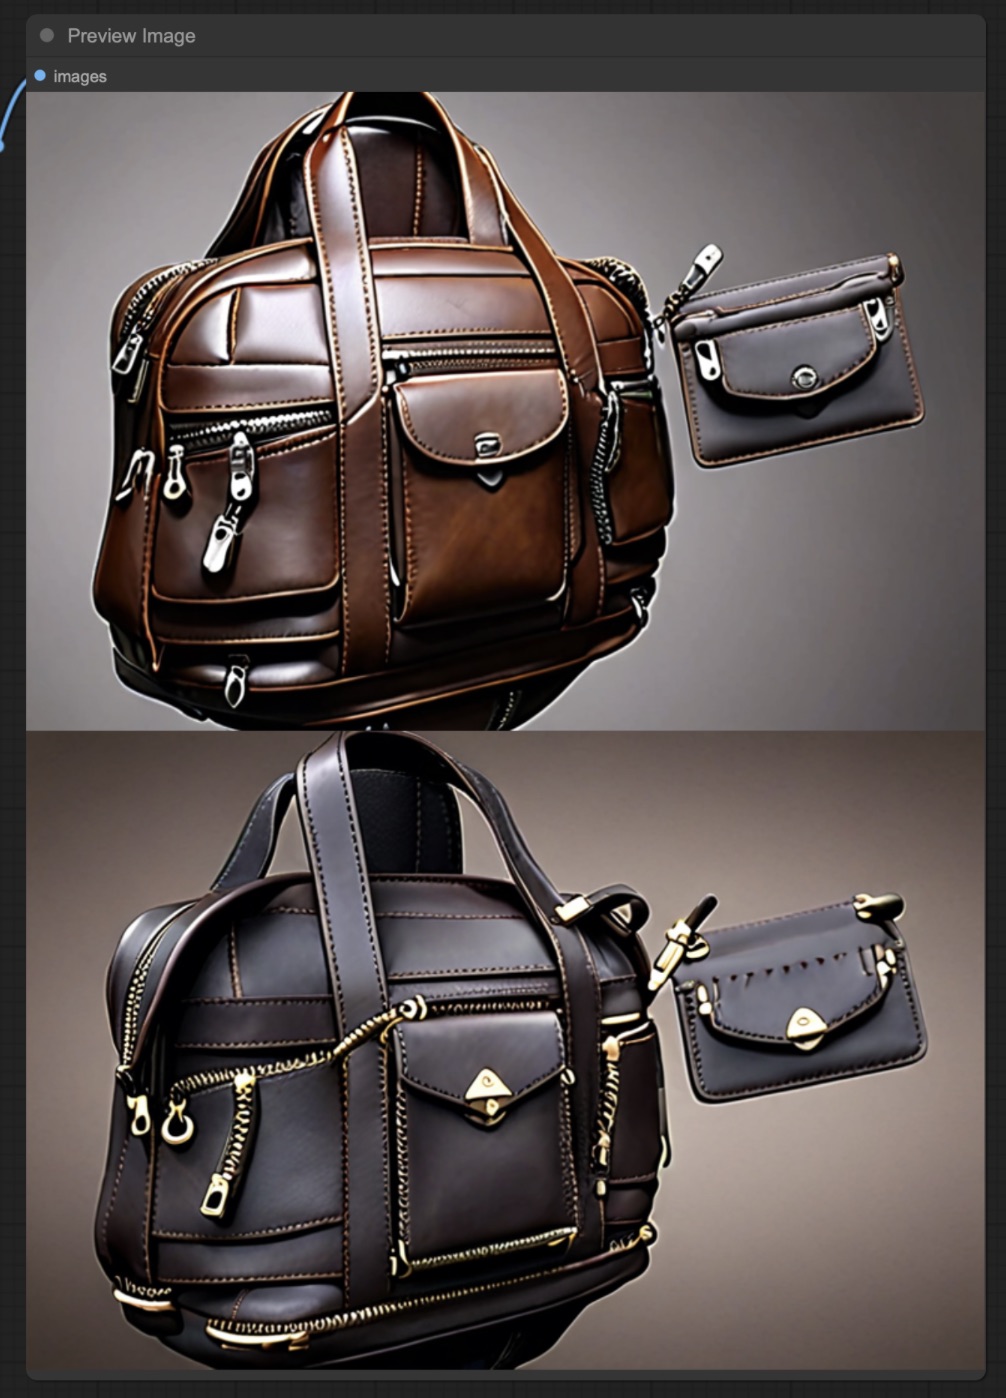
Canvas Texture Example:
2.4 Step 4: Advanced Material Changes with RGB Mask and IPAdapter
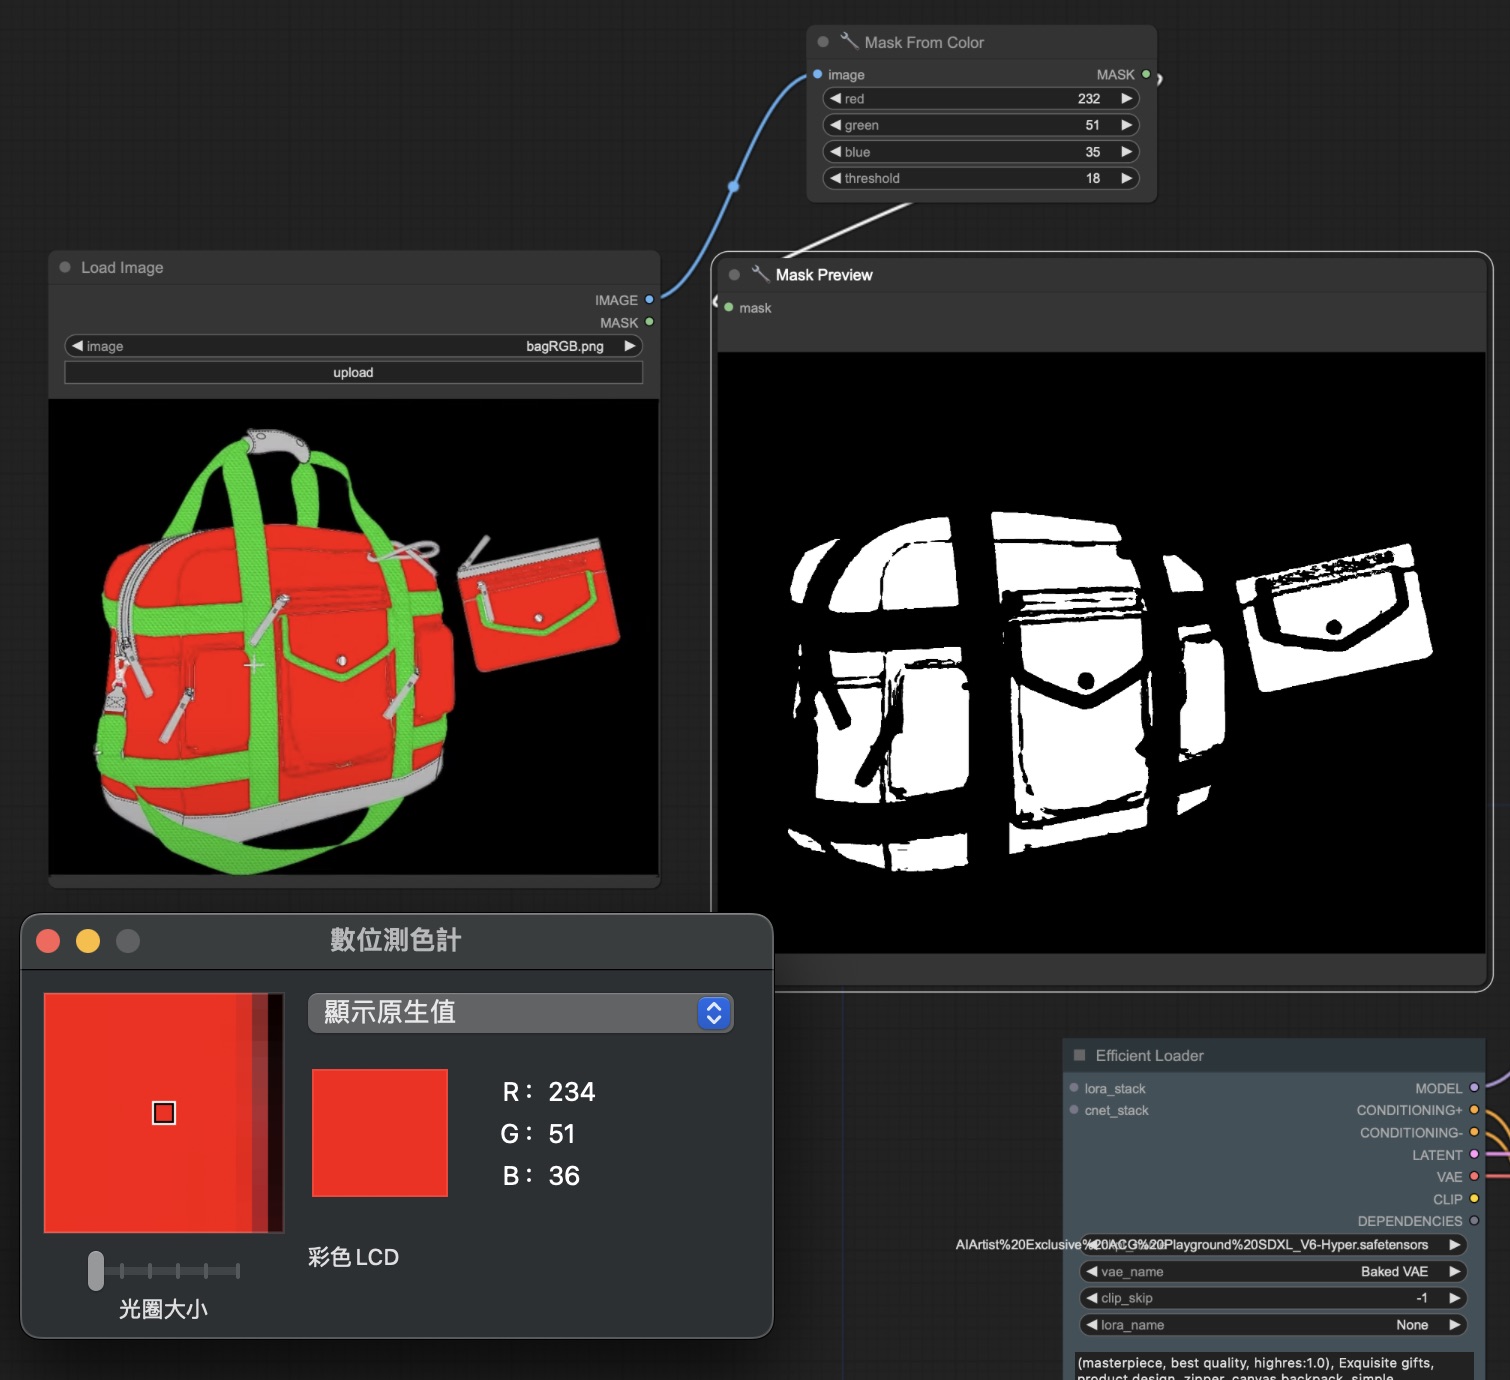
In this step, the RGB mask is created using Photoshop to isolate different parts of the product for specific material alterations. The Bag Sample is converted into an RGB image, where different sections (like straps, pockets, and body) are assigned distinct colors (red, green, blue). This allows precise control over which parts of the product will receive material changes.
Before applying textures, it is recommended to use a color tool to inspect the color range and ensure accurate targeting of the channels (red, green, blue). This helps avoid misalignment when applying textures to specific parts of the product.
- RGB Mask Example:
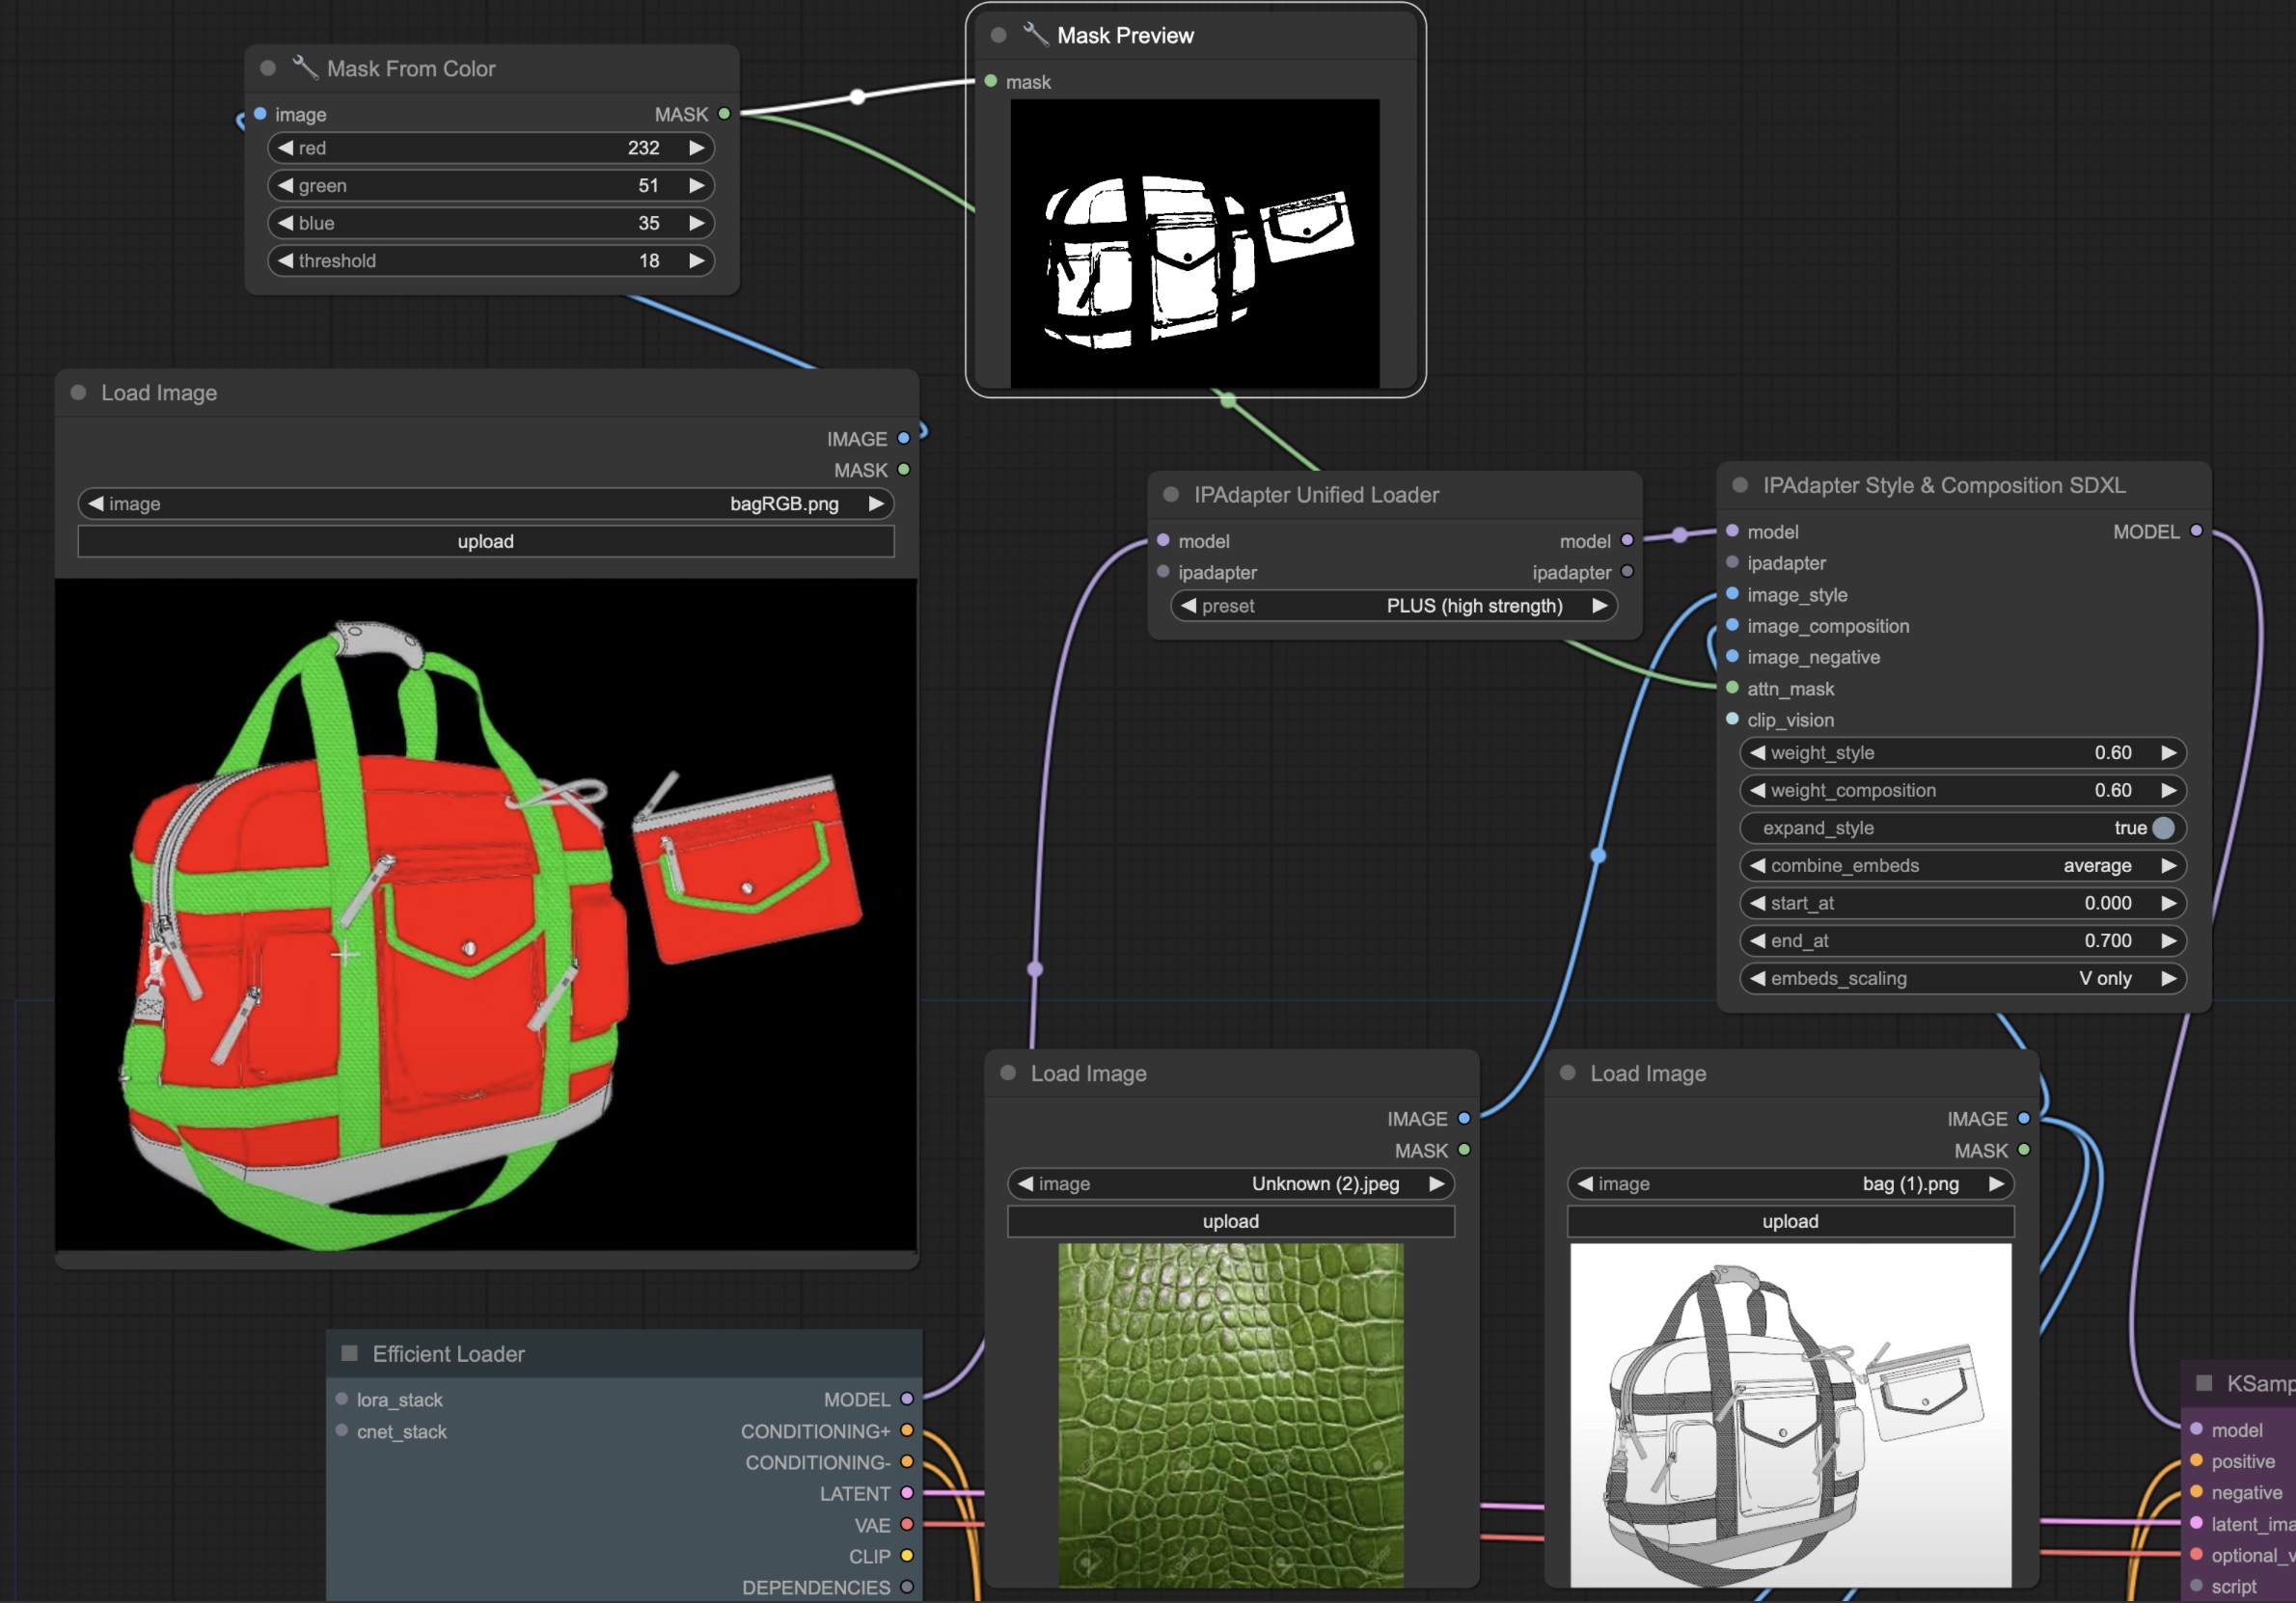
Once the RGB mask is created, the red channel is isolated and used to apply a new texture to the selected area of the backpack using IPAdapter.
- Mask Preview:
Finally, the IPAdapter is applied to modify the texture of the red area, giving the backpack a crocodile skin effect, while leaving the green and blue areas unchanged.
- Material Applied to Mask:
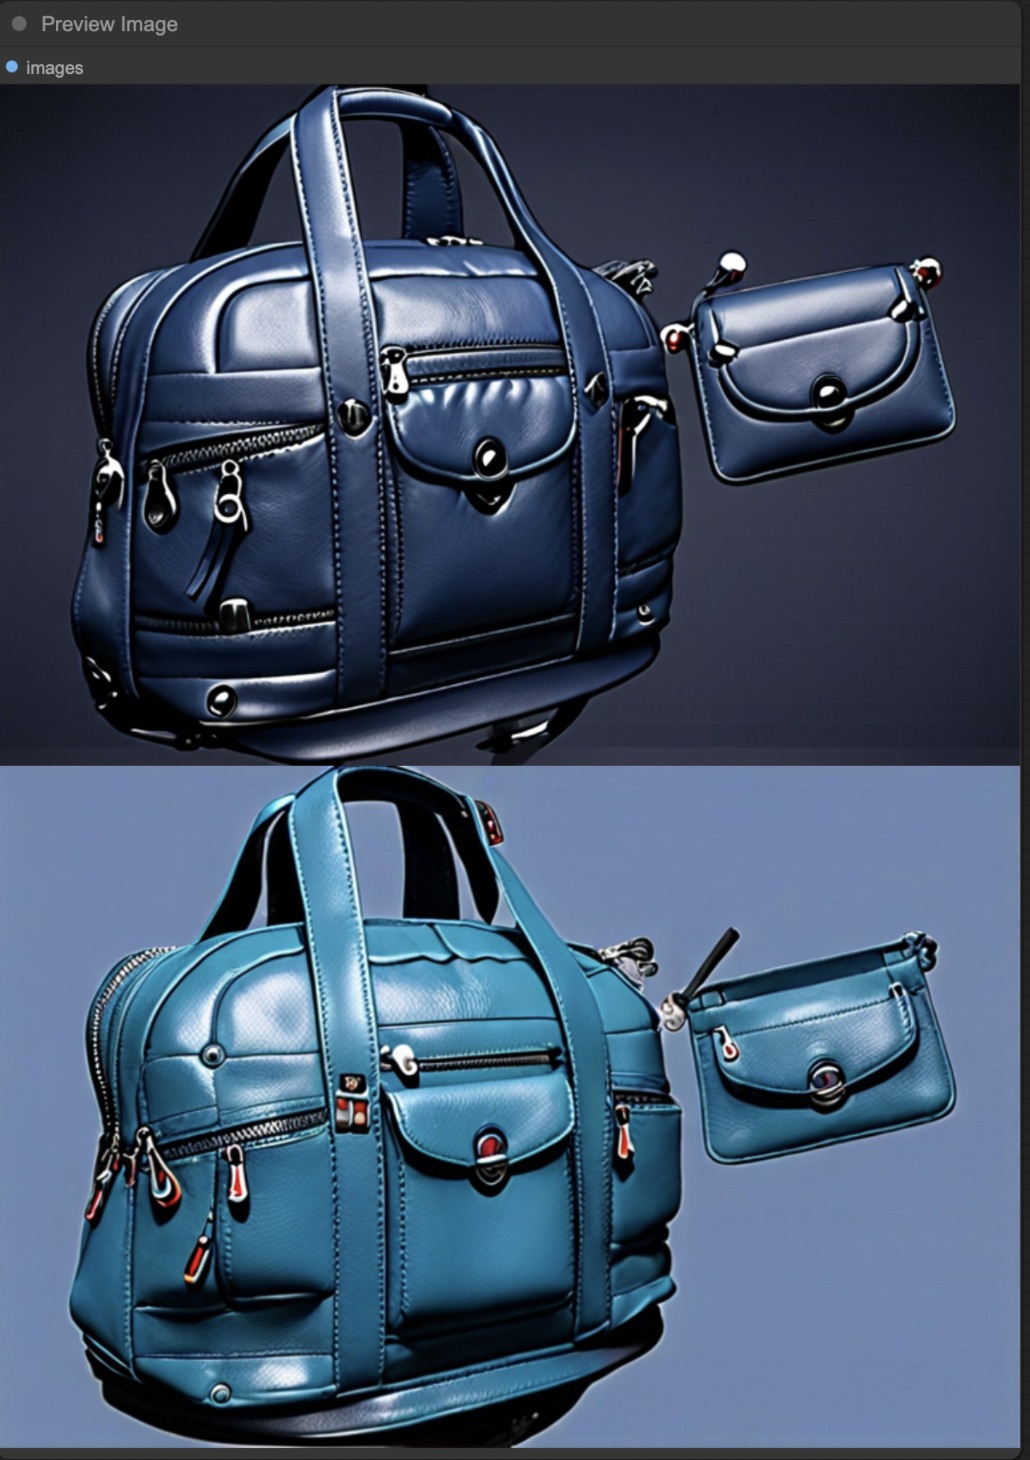
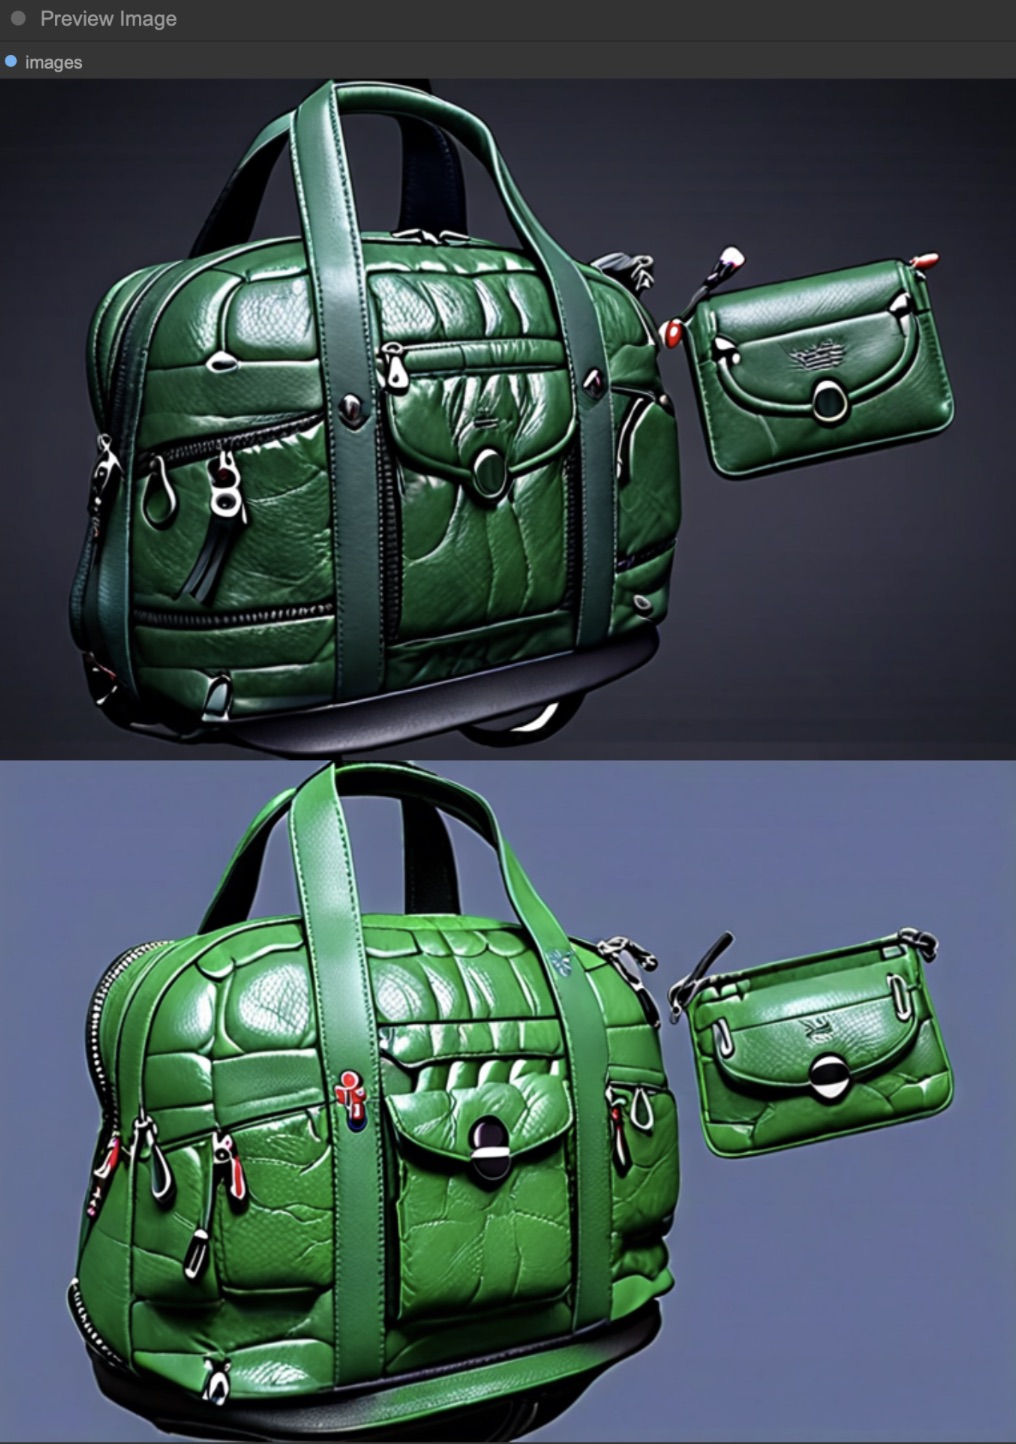
2.5 Step 5: Final Render and Material Comparison
In this step, we show the final product render using different materials and demonstrate how adjusting the weight of each material influences the final outcome. Below, you’ll see the original material images followed by the renders that incorporate these materials. This comparison allows you to better understand the impact of texture and weight in product rendering.
Material 1: Crocodile Skin
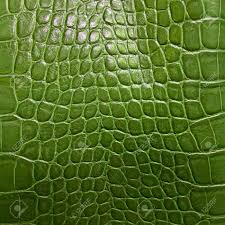
Final Render with Crocodile Skin (Weight 0.3)

Final Render with Crocodile Skin (Weight 0.5)
Material 2: Distressed Fabric

Final Render with Distressed Fabric (Weight 0.6)

By adjusting the weight of each material, we can achieve varying levels of influence on the product’s texture, allowing for precise control over the final appearance.
3 Conclusion
In this workflow, we’ve demonstrated how to leverage ComfyUI, ControlNet, and IPAdapter to create high-quality product renders. By combining multiple steps, such as enhancing line art, applying texture modifications through positive condition keywords, and using advanced techniques like RGB masking, we’ve shown how AI-driven tools can give you precise control over specific design elements.
This process is highly versatile, making it ideal for industries like e-commerce, advertising, and product design where high-quality visuals are essential. By adjusting weights and materials, you can further refine your product’s final appearance, ensuring that each render meets your aesthetic goals.
While this workflow focused on using the red channel to modify textures, in practice, multiple channels can be utilized to apply different materials to various parts of a product. This technique allows for more precise control and customization, enabling designers to apply specific textures to different regions, creating a more intricate and detailed final render.
Experimenting with different textures and weights allows for a wide variety of outcomes, demonstrating the power of AI in creating customizable and professional product renders with minimal manual input.